-
Whatsapp: +86 15516933785
-
Email: hanlin@hanlinplayground.com
-
Address: Shangjie District, Zhengzhou City, Henan Province, China
-
Whatsapp: +86 15516933785
-
Email: hanlin@hanlinplayground.com
-
Address: Shangjie District, Zhengzhou City, Henan Province, China
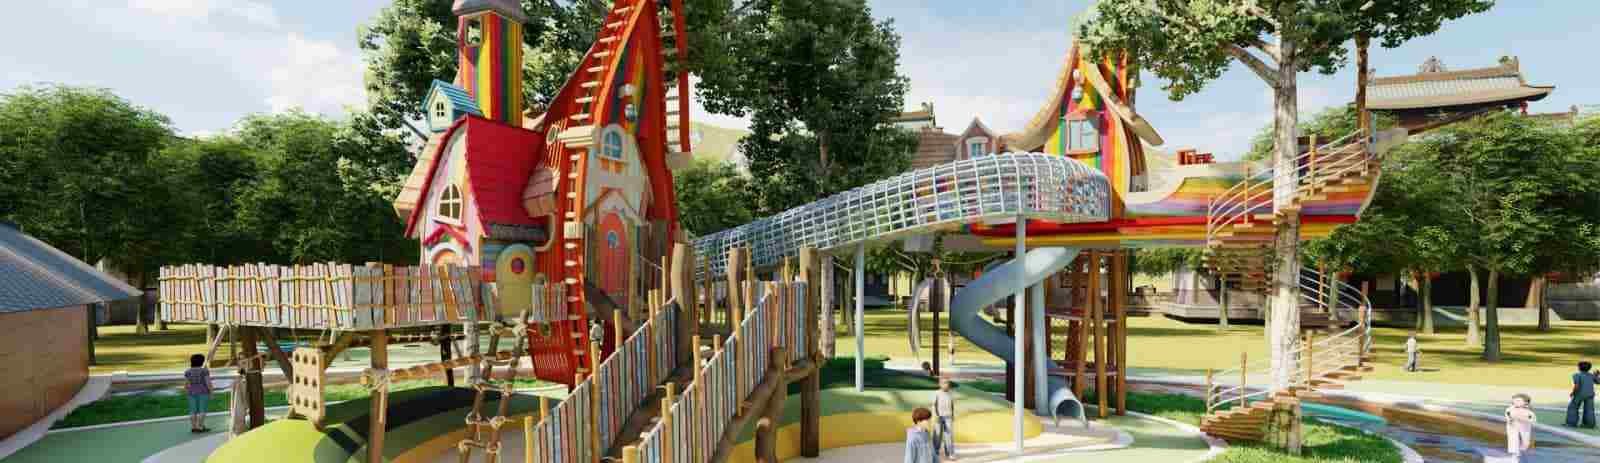
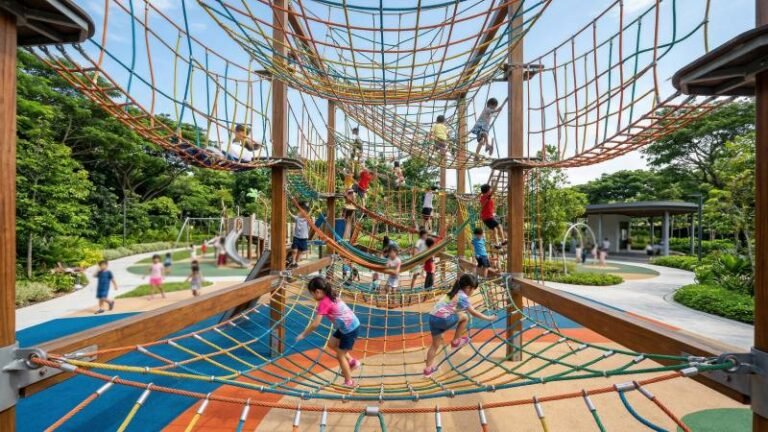
16 Creative Outdoor Preschool Playground Ideas on a Budget: DIY, Nature, and Sensory Play
How can you create an engaging, educational, and safe outdoor preschool playground using budget-friendly and DIY methods?
Creating a budget-friendly outdoor playground involves utilizing DIY solutions, natural elements, and sensory play stations to maximize engagement without high costs. Key strategies include repurposing materials like tires and pallets for climbing and dramatic play, integrating low-cost natural features like log stumps and gardens, and designing flexible zones for art and music to support comprehensive child development.
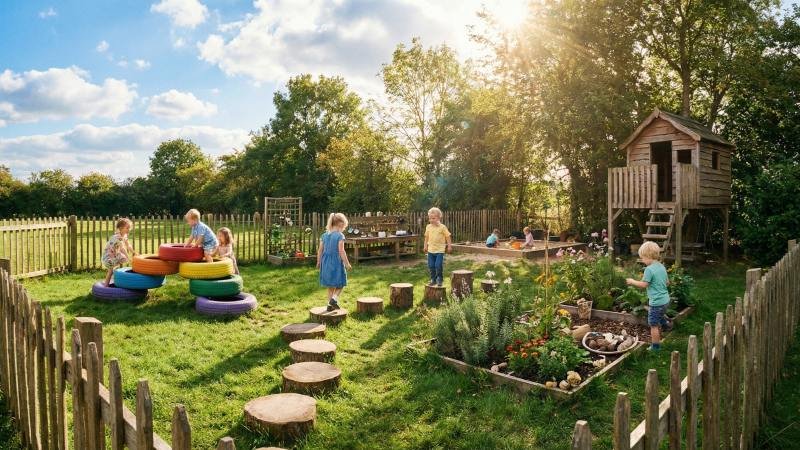
Bringing Nature into the Play Zone
Incorporating nature into play zones involves utilizing organic materials like tree stumps, repurposed wood, and living plants to create versatile, low-cost structures. These elements foster open-ended play and physical development, offering a sustainable alternative to expensive, static plastic equipment while requiring minimal installation expertise compared to commercial steel structures.
Log Stumps for Seating and Balancing Beams
Log stumps serve as a fundamental building block for natural playgrounds. They function similarly to modular components in a commercial playground system but cost significantly less. You can often source these for free from local arborists or tree removal services.
But here is the catch: safety is still the priority. Before installation, you must debark and sand the wood to prevent splinters.
Key Installation Considerations:
- Anchoring: Just as a steel post requires a footer, tall stumps must be anchored. Bury at least one-third of the log underground to ensure stability.
- Surfacing: Ensure the area around balancing logs has appropriate impact-absorbing surfacing, such as wood chips or mulch.
- Spacing: Place stumps close enough for a child’s stride, typically 12 to 18 inches apart for preschoolers.
Different heights serve different developmental functions.
| Log Height | Primary Function | Installation Requirement |
|---|---|---|
| 8-12 inches | Seating / Gathering Circle | Can rest on grade if wide enough |
| 12-18 inches | Stepping / Balancing | Shallow burial for stability |
| 18-24 inches | Jumping / Tables | Deep burial (1/3 of length) |
Note: Wood density and rot resistance vary significantly by species. Ensure the timber chosen is suitable for ground contact to prevent premature decay. For schools looking for a more standardized natural look, pre-manufactured wooden log obstacle courses are also an option.
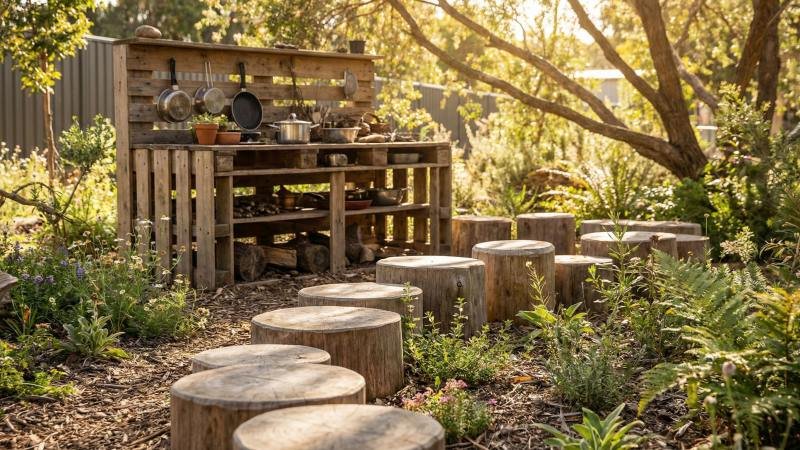
Building a Simple Mud Kitchen with Upcycled Pallets
A mud kitchen acts as a workstation for constructive play. It mimics the layout of a laboratory bench where materials are mixed and tested. Using shipping pallets is the most cost-effective construction method.
Safety Protocol for Pallets:
You must inspect the stamps on the wood. Only use pallets marked “HT” (Heat Treated). Never use pallets marked “MB” (Methyl Bromide), as this indicates chemical fumigation that is unsafe for children.
Construction Steps:
- Preparation: Disassemble the pallet and remove all nails. Sand surfaces until smooth.
- Assembly: Construct a simple frame and countertop.
- Integration: Cut holes in the countertop surface to fit stainless steel bowls. These act as the “sinks” or mixing basins.
Here is the reality check regarding maintenance: Unlike commercial HDPE (plastic) kitchens, a wood kitchen requires annual sealing. Use a non-toxic outdoor sealant to protect the timber from moisture and rot. This maintenance ensures the structural integrity of the unit remains comparable to professionally manufactured equipment over time.
Creating a Vegetable and Butterfly Garden for Hands-On Learning
Gardens introduce a biological component to the playground infrastructure. They are not just decoration; think of them as active learning stations.
Raised Bed Construction:
Build raised garden beds rather than planting directly in the ground. This protects the soil from foot traffic and brings the plants closer to the child’s eye level. Use naturally rot-resistant wood like cedar or redwood. Avoid pressure-treated lumber that may leach chemicals into the soil.
Plant Selection Strategy:
Select plants that serve a specific educational purpose.
- Pollinator Plants: Milkweed and Buddleja attract butterflies, allowing children to observe life cycles directly.
- Fast Growers: Radishes and sunflowers provide quick feedback loops for young observers.
- Texture: Lamb’s ear and ornamental grasses offer tactile feedback without thorns.
This area functions like a biology lab. It requires defined boundaries to prevent trampling. Install low fencing or heavy timber borders to clearly demarcate the “lab” zone from the high-energy “active” zones.
Tree Slice Stepping Stones for Natural Paths
Tree slices, often called “cookies” in the timber industry, create functional pathways. They guide traffic flow through the playground, defining walking zones similar to how concrete curbs define walkways in commercial parks, but with a natural aesthetic.
Material Preparation:
Freshly cut wood contains moisture. You must allow the slices to dry (cure) before sealing. If sealed while wet, the wood will rot from the inside out. Apply a coat of raw linseed oil or a marine-grade varnish to seal the grain against water absorption.
Installation Logic:
- Excavation: Dig a shallow hole matching the shape of the slice.
- Base Layer: Add a 1-inch layer of gravel or sand for drainage. This prevents the wood from sitting in standing water.
- Leveling: Place the slice so it is flush with the surrounding ground. This prevents tripping hazards.
High-Engagement Sensory Play Stations
High-engagement sensory stations are constructed using repurposed materials to stimulate sight, sound, and touch. These installations, such as water walls made from PVC and music stations utilizing kitchenware, provide critical sensory integration opportunities comparable to specialized therapeutic equipment but at a fraction of the cost.
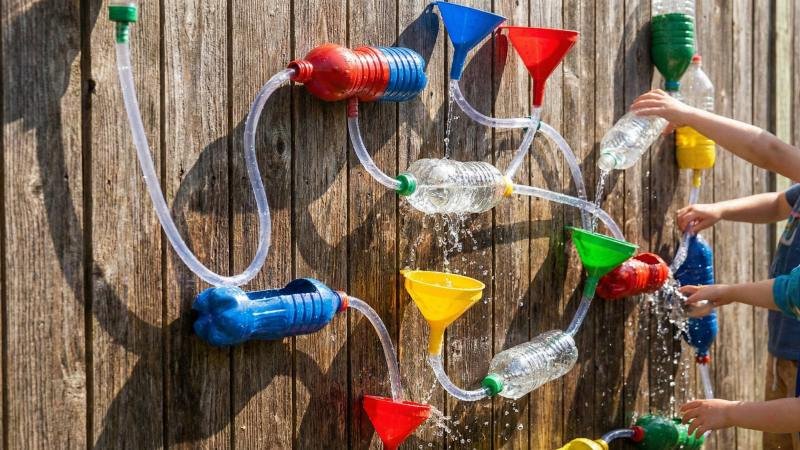
DIY Water Walls Using Recycled Pipes and Funnels
A water wall functions like a vertical gravity system, similar to the cascading water tables found in commercial water parks. Instead of pumps and electricity, however, this system relies entirely on manual pouring and gravity.
Structural Framework:
You need a vertical mounting surface. A chain-link fence or a wooden lattice works best because it offers a grid for flexible attachment.
Component Assembly:
Use plastic funnels, clear tubing, and PVC pipes. Cut the PVC pipes into various lengths and drill holes in some to create “shower” effects. Attach these components to the fence using heavy-duty zip ties.
The “Plumbing” Logic:
Arrange the pieces so that water flows from one container to the next.
- Top Tier: Large funnels to catch the initial pour.
- Middle Tier: Angled pipes to direct the flow sideways.
- Bottom Tier: Basins to catch and recirculate the water.
Using zip ties allows you to reconfigure the path. This modularity mimics the adjustable nature of commercial STEM activity panels, allowing teachers to change the “curriculum” by altering the water’s route.
Texture Paths with Stones, Grass, and Wood Chips
A texture path creates a sensory integration experience focused on the feet. It operates on the same principle as varied outdoor playground flooring, where different textures signal different zones or activities.
Zoning and Containment:
You must create distinct sections for each material to prevent cross-contamination. Use timber edging or buried bricks to build borders between sections. Without strong containment, loose materials like wood chips will migrate into the grass, reducing the sensory distinctiveness.
Material Selection Guide:
| Material | Sensory Texture | Durability |
|---|---|---|
| River Rocks | Smooth, Hard, Cool | High |
| Artificial Turf | Soft, Ticklish | High |
| Sand | Gritty, Shiftable | Medium (Requires refilling) |
| Tree Bark | Rough, Scratchy | Medium (Decomposes) |
| Pavers | Flat, Solid | High |
This path aids in desensitization for children with tactile defensiveness. It functions like a physical therapy course, encouraging children to adapt their balance and gait based on the changing ground surface.
Outdoor Music Walls Using Pots, Pans, and Chimes
Music walls transfer auditory learning from the indoor music room to the outdoors. They function similarly to the fixed percussion panels found on large playground structures but use upcycled metal.
Acoustic Materials:
Metal objects produce the best sound resonance outdoors.
- Percussion: Old stainless steel pots, muffin tins, and colanders.
- Chimes: Cut lengths of electrical conduit or copper pipe.
- Scrapers: Grill grates or corrugated metal sheets.
Mounting and Safety:
Secure these items to a wooden fence or pallet. Use washers and screws for a permanent hold. Unlike a loose toy, these must be fixed rigidly to withstand enthusiastic drumming.
Safety Check:
Don’t skip the safety check: You must file down any sharp edges on cut pipes or metal pans. Just as a manufacturer deburrs steel before powder coating, you must ensure no jagged edges remain.
Sandboxes with Hidden Treasures and Digging Tools
A sandbox is more than a container; it is an excavation site. While basic sandboxes offer tactile play, enhancing them with “hidden” elements introduces object permanence concepts.
Drainage and Foundation:
Why do most DIY sandboxes fail? Poor drainage leading to waterlogging.
- Excavation: Dig down 6 to 10 inches.
- Barrier: Lay down landscape geotextile fabric. This fabric functions like the filter cloth in a commercial drainage system; it lets water drain out but prevents the sand from mixing with the soil below.
- Fill: Use washed play sand. Avoid construction sand, which may contain silica dust or sharp grit.
Note: Verify your local childcare licensing standards regarding sand depth to ensure compliance with fall height regulations.
Treasure Integration:
Bury permanent fixtures at the bottom before filling with sand, such as synthetic “dinosaur bones” or flat stones. This ensures that no matter how deep children dig, they find a stable “bedrock” layer rather than tearing through the bottom fabric. This mimics archaeological dig sites used in educational museums.
Gross Motor Activities Without Big Structures
You can achieve comprehensive gross motor development by utilizing landscape features, surface markings, and modular upcycled items to target large muscle groups. Integrating elements like earth mounds, tire courses, and painted games allows children to practice climbing, balancing, and coordination skills effectively, offering greater adaptability than static steel structures.
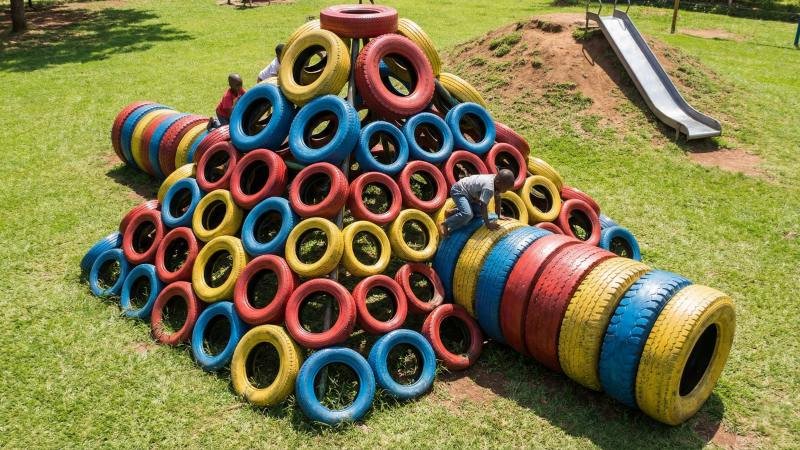
Upcycled Tire Climbers and Tunnels
Tires are the “modular bricks” of budget playground construction. They are incredibly durable and weather-resistant, functioning similarly to heavy-duty rubber surfacing tiles but with structural volume. You can bolt them together to create climbing walls, tunnels, or stepping stones.
Crucial Preparation Steps:
Before a tire enters the play zone, it needs some prep work.
- Drainage: You must drill holes in the sidewalls of every tire. If you skip this, the tire becomes a breeding ground for mosquitoes and stagnant water.
- Cleaning: Scrub the tires to remove road oils and brake dust.
- Hardware: Use galvanized bolts and washers to connect tires. This prevents them from shifting under a child’s weight.
Configuration vs. Skill Target:
| Tire Configuration | Primary Motor Skill | Installation Note |
|---|---|---|
| Flat Grid (Stepping) | Agility & Balance | Bury halfway for stability |
| Vertical Stack (Tower) | Climbing & Upper Body | Bolting together is mandatory |
| Half-Buried Arch | Crawling & Spatial Awareness | Ensure smooth cut edges |
Painted Pavement Games like Hopscotch and Mazes
Painted games utilize existing asphalt or concrete surfaces, transforming “dead space” into active zones without adding physical obstructions. This is similar to how commercial play centers use colored flooring to designate safety or activity zones; here, the paint directs physical movement.
Paint Selection:
Use traffic-grade marking paint or specialized acrylic concrete paint. Standard house paint will peel rapidly under foot traffic and UV exposure. You want a product designed to bond with masonry.
Beyond Hopscotch:
While hopscotch is standard, consider painting “Action Lines.”
- Zig-Zags: Require children to balance like they are on a tightrope.
- Frog Pads: Circles spaced out to encourage two-footed jumping.
- Snail Mazes: Spirals that require tight turning and coordination to reach the center.
These markings guide high-intensity activity. They tell the child how to move—jump, spin, or tiptoe—without a teacher needing to give verbal instructions constantly.
Small Earth Mounds or Hill Slides for Climbing
Why buy a steel tower when you can build a berm? An earth mound uses topography to create resistance. Running up a grassy hill engages the quadriceps and calves differently than climbing a ladder.
Construction Basics:
You are essentially building a small, controlled hill.
- Core: Use clean fill dirt for the bulk of the mound to reduce costs.
- Cap: Cover the top layer with high-quality topsoil to support grass or install artificial turf.
- Slide Integration: You can embed a wide, plastic slide directly into the side of the hill.
Safety Advantage:
A hill slide eliminates the “fall height” risk associated with traditional slide ladders. If a child slips while climbing up the hill, they roll down a soft, grassy slope rather than falling from a vertical ladder onto the ground. This structural safety allows even toddlers to participate without strict supervision. Check the CPSC Public Playground Safety Handbook for specific guidelines on slide gradients and run-outs.
Note: Soil settling rates depend on the soil composition. You may need to add topsoil after the first rainy season to maintain the mound’s height and shape.
Obstacle Courses Made from Pool Noodles and Cones
This approach utilizes “loose parts” to create temporary, changeable circuits. Think of this like a sports training drill, where the equipment is lightweight and mobile.
Pool Noodle Engineering:
Pool noodles are soft, safe, and easily modified.
- Arches: Insert garden stakes into the ground and slide the hollow ends of the noodle over them to create crawl-through tunnels.
- Hurdles: Balance noodles on top of overturned buckets or cones for jumping practice.
- Rings: Tape the ends together to create rings for tossing or foot-target games.
The Agility Factor:
Unlike a fixed wooden bridge, you can change this course daily. One day it is a crawling challenge; the next, it is a jumping course. This variability prevents boredom and challenges children to adapt their motor planning strategies constantly.
Encouraging Creativity and Quiet Time Outdoors
Outdoor creativity and quiet zones are established by designating low-energy areas equipped with vertical art surfaces, reading shelters, and open-ended construction materials. These dedicated spaces separate high-energy physical activities from cognitive tasks, allowing children to engage in focused artistic work and imaginative role-play using weather-resistant modifications of standard educational tools.
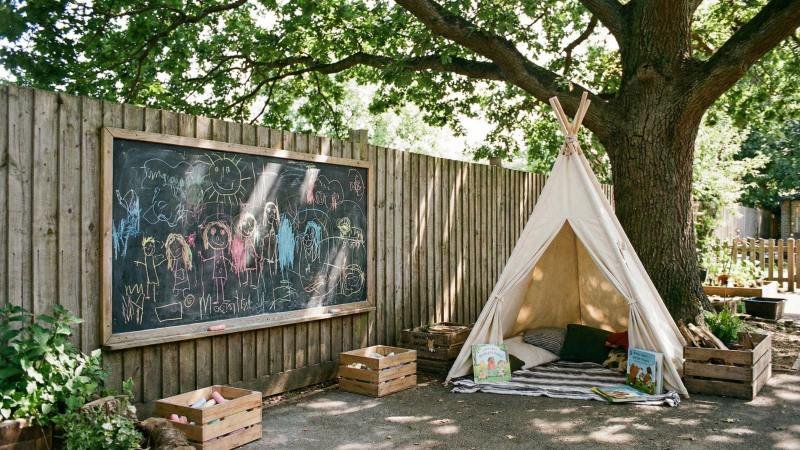
Large Chalkboards and Plexiglass Easels on Fences
Vertical surfaces transform a standard chain-link or wooden fence into an art studio. This approach utilizes existing vertical infrastructure, similar to how commercial activity panels utilize wall space to save valuable ground area.
Material Options and Applications:
| Surface Type | Material Required | Sensory Experience | Maintenance |
|---|---|---|---|
| Chalkboard | Exterior-grade plywood + Chalkboard Paint | Gritty, resistive friction | Requires water wash-down |
| Plexiglass | Acrylic sheets + Zip ties/Bolts | Smooth, fluid (Paint/Markers) | Squeegee cleaning |
Installation Logic:
- Chalkboards: You must use marine-grade plywood or cement board as the base. Standard plywood will delaminate (peel apart) when exposed to rain. Apply at least three coats of outdoor-rated chalkboard paint.
- Plexiglass (Acrylic): This offers a unique transparent canvas. Children can paint directly onto the clear surface while looking at the scenery behind it. It promotes spatial depth perception.
Note: Acrylic sheets come in various thicknesses. Thin sheets (under 1/4 inch) may crack under heavy impact. Select a thickness designed for outdoor durability.
Reading Nooks Under Trees or Teepees
The playground often lacks spaces for solitude. A reading nook provides “visual privacy,” allowing a child to observe the environment from a secure, enclosed point. This concept mirrors a sensory “cool-down” zone found in modern Montessori-style design; it offers a necessary retreat from sensory overload.
Natural Shelters:
Utilize the “drip line” of a mature tree. The canopy provides natural shade. You can enhance this by hanging light fabrics or ribbons from lower branches to define the “walls” of the room without blocking sightlines for supervision.
Constructed Shelters (Teepees):
- Willow Structures: Living willow branches can be woven into a dome. As they grow, they form a leafy, green cave.
- Canvas Teepees: Use heavy-duty, outdoor canvas (similar to sailcloth). Avoid indoor cotton fabrics as they will mildew rapidly.
Furnishing the Floor:
Ground moisture is the enemy of reading nooks. Never place cushions directly on the grass. Use a waterproof tarp or a raised wooden pallet deck as the sub-floor. Then, add outdoor-rated cushions or yoga mats that can be wiped clean.
Loose Parts Play Area with Crates, Planks, and Fabrics
“Loose parts” are materials with no specific set of instructions. Unlike a puzzle that has one correct solution, loose parts are like modular components; they can become anything the child’s imagination requires.
The Inventory List:
- Plastic Milk Crates: strong, stackable, and weather-proof.
- PVC Guttering: used for marble runs or water channels.
- Tarpaulins and Clips: for building forts.
- Wooden Planks: sanded smooth for balance beams or ramps.
Operational Management:
This area requires a storage strategy. Just as an equipment room needs shelving, loose parts need a dedicated shed or large bins. If left scattered, they become trip hazards and degrade quickly. The “cleanup” process is part of the play activity, teaching sorting and categorization skills.
This station supports complex engineering play. Children learn about fulcrums, structural stability, and load-bearing capacities through trial and error, far better than they would with fixed plastic equipment.
Dramatic Play Stages for Storytelling and Performance
A stage creates a focal point for social interaction and oral language development. It elevates the child physically, signaling that it is “performance time.” This concept is often expanded in larger parks through dedicated outdoor theme playgrounds, but a DIY stage serves the same fundamental purpose.
Structural Design:
The stage does not need to be high. A platform raised just 6 inches off the ground is sufficient to create the psychological effect of a stage.
- Decking: Use composite decking material if the budget allows. It requires zero sanding or staining compared to pressure-treated wood.
- Backdrop: Install a simple rod or wire between two posts behind the stage. Hang shower curtains or outdoor fabric. This allows children to change the “scene” or hide for dramatic entrances.
Acoustic Considerations:
Position the stage away from the noisiest areas (like the tire climbers). This allows the “audience” to hear the performers without shouting. It functions like an auditorium; the orientation should block background noise to ensure the speakers are heard clearly.
Practical Tips for Planning Your Outdoor Space
Effective playground planning requires zoning activities by energy level to prevent collisions, selecting commercial-grade rot-resistant materials, and installing compliant impact-absorbing surfacing. This strategic approach ensures the longevity of the infrastructure and compliance with safety standards, ultimately reducing long-term maintenance costs and liability risks.

Zoning the Playground to Manage Energy Levels
Zoning is the architectural organization of play. It functions similar to designing a professional park layout, where high-traffic active zones are kept separate from delicate observational areas to prevent accidents. You must separate “high-energy” gross motor activities from “low-energy” quiet play.
The Buffer Zone Concept:
Let’s talk buffer zones. Never place a tire swing directly next to a reading nook. Without a buffer zone, running children will inevitably crash into those sitting quietly. Use pathways, planters, or low fences to create physical boundaries between these zones.
Visibility and Sightlines:
Design the layout so a teacher can scan the entire area from a single vantage point. Avoid creating “blind spots” behind tall structures or dense bushes. Ideally, place the highest risk equipment (like climbers) in the center of the visual field, while safer activities (like chalkboards) can be on the perimeter.
Selecting Durable and Weather-Resistant Materials
Make no mistake: moisture is the primary enemy in outdoor construction. Selecting the wrong material will lead to structural failure within two years. You must choose materials that can withstand UV radiation and rain without degrading.
Material Comparison Guide:
| Material Type | Pros | Cons | Best Use |
|---|---|---|---|
| Cedar / Redwood | Natural rot resistance, stays cool | Expensive, requires annual sealing | Garden beds, Mud kitchens |
| Pressure-Treated Pine | Very cheap, long lifespan | Chemicals may leach (check safety ratings) | Structural posts, Framing |
| HDPE Plastic | Waterproof, no splinters, easy to clean | Can warp in extreme heat, expensive | Tabletops, Slides |
| Galvanized Steel | Highest strength, rust-proof | Gets hot in sun, hard to cut | Brackets, Fasteners |
Hardware Selection:
Always use hot-dipped galvanized or stainless steel screws and bolts. Standard zinc-plated hardware acts like a “sacrificial anode” and will rust quickly when exposed to wet lumber, causing your structures to wobble and fail.
Ensuring Safety Surfacing Standards for DIY Equipment
If there is one thing you cannot cut corners on, it is surfacing. Surfacing is the most critical safety feature as it acts as the shock absorber for the playground. Grass is not a safety surface; compacted dirt becomes as hard as concrete over time. You must install a dedicated impact-attenuating layer under any equipment where a child’s feet leave the ground.
Critical Fall Height:
The depth of the loose-fill material corresponds to the height of the equipment.
- 6 feet equipment height: Requires 9 inches of compressed wood chips.
- 4 feet equipment height: Requires 9 inches of sand or pea gravel.
Loose-Fill Options:
- Engineered Wood Fiber (EWF): Specifically designed to knit together to allow wheelchair access while absorbing impact.
- Pea Gravel: Excellent drainage but creates a shifting surface that is hard to walk on.
- Rubber Mulch: Long-lasting but can get very hot in summer.
Note: Critical Fall Height standards (such as ASTM F1292 in the US) vary by region and specific material density. Always verify the required depth with your surfacing supplier or local safety inspector before installation.
Incorporating Shade Sails and Shelters for Sun Protection
Think shade is just a luxury? Think again—it is a health requirement. Equipment exposed to direct sunlight can reach burn-inducing temperatures. A plastic slide in the sun can reach over 140°F (60°C).
Sun Mapping:
Before installing posts, track the sun’s path. A shade sail installed directly overhead might be useless at 3:00 PM if the sun angles sharply to the west. Position your shade structures to block the sun during peak play hours (usually 10:00 AM to 2:00 PM).
Structural Tension:
Installing a shade sail is different from hanging a tarp. Shade sails rely on high tension to prevent flapping and sagging.
- Posts: You must use steel or heavy timber posts (6×6 inch minimum).
- Footings: These posts require deep concrete footings because the wind load on the sail creates a massive lever arm force that can rip shallow posts out of the ground.
- Angling: Install one corner lower than the others. This shape sheds water effectively; a flat sail will gather water, stretch, and eventually collapse under the weight.
Conclusion
The bottom line? Transforming an outdoor space for preschoolers does not necessitate a massive budget or heavy industrial machinery. By focusing on modular, DIY solutions like upcycled tire climbers, mud kitchens, and natural sensory paths, you can build a rich educational environment that rivals expensive commercial playgrounds.
The key to success lies in thoughtful planning—prioritizing safety surfacing, selecting durable materials like redwood or cedar, and zoning activities to manage energy levels. Whether you are adding a simple music wall or constructing an earth mound slide, these 16 ideas provide actionable steps to create a dynamic outdoor classroom where children can explore, learn, and grow safely.