-
Whatsapp: +86 15516933785
-
Email: hanlin@hanlinplayground.com
-
Address: Shangjie District, Zhengzhou City, Henan Province, China
-
Whatsapp: +86 15516933785
-
Email: hanlin@hanlinplayground.com
-
Address: Shangjie District, Zhengzhou City, Henan Province, China
Commercial Indoor Playground Design: Layouts, Themes, and Floor Plans
What are the fundamental elements required to design a highly profitable and safe commercial indoor playground?
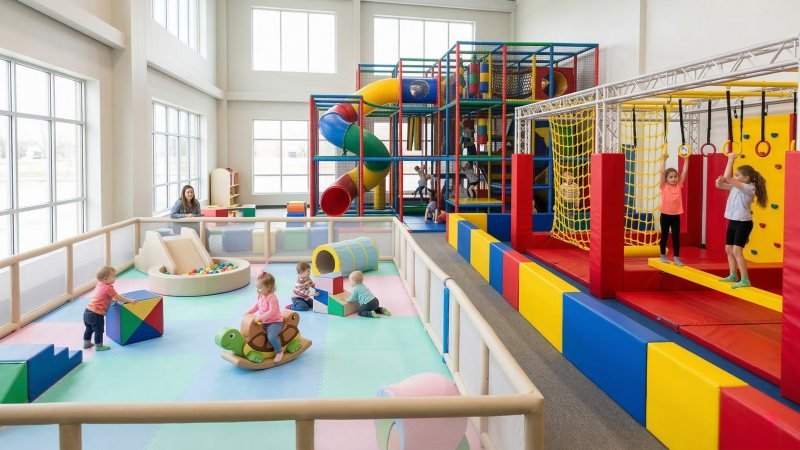
A successful commercial indoor playground design requires a strategic floor plan layout, immersive thematic aesthetics, age-specific play zones, and rigorous safety engineering. Combining these critical elements optimizes space utilization, ensures strict regulatory compliance, and maximizes the long-term return on investment for family entertainment centers.
Drafting the Optimal Floor Plan Layout
How do you create a floor plan that maximizes both fun for kids and profits for your business?
Drafting an optimal floor plan layout requires a strategic distribution of play equipment, seating areas, and walkways. A successful blueprint balances high-capacity attractions with clear sightlines and efficient traffic flow to ensure maximum safety and operational efficiency.
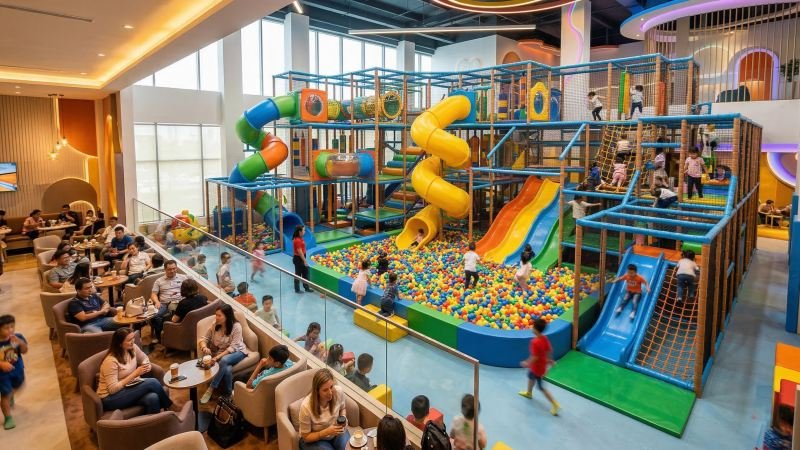
Mapping Play Zones Against Parent Seating
Parents are the primary decision-makers for family entertainment centers. Here’s the reality: their comfort directly impacts your bottom line. If adults are comfortable, families stay longer. That means seating cannot be an afterthought in your layout.
You must situate seating areas centrally or strategically along the perimeter. This placement provides clear, unobstructed sightlines into the main play frames. Think of parent seating like the central viewing gallery in a large trampoline park. The observing parents need a clear, direct view of all active play areas to feel secure.
Think about it—have you ever seen a highly profitable center with miserable parents standing around the perimeter? Industry data indicates that comfortable, highly visible seating can increase customer dwell time by up to 30%. Increased dwell time directly boosts secondary revenue streams, such as food and beverage sales.
| Seating Strategy | Visibility | Space Efficiency | Best For |
|---|---|---|---|
| Central Cafe Seating | 360-degree view of all zones | Requires a large open footprint | Large facilities with full menus |
| Perimeter Benches | Front-facing view of specific frames | High space efficiency | Narrow or smaller spaces |
| Integrated Zone Seating | Targeted view of toddler/soft play | Medium space efficiency | Facilities with highly segmented age zones |
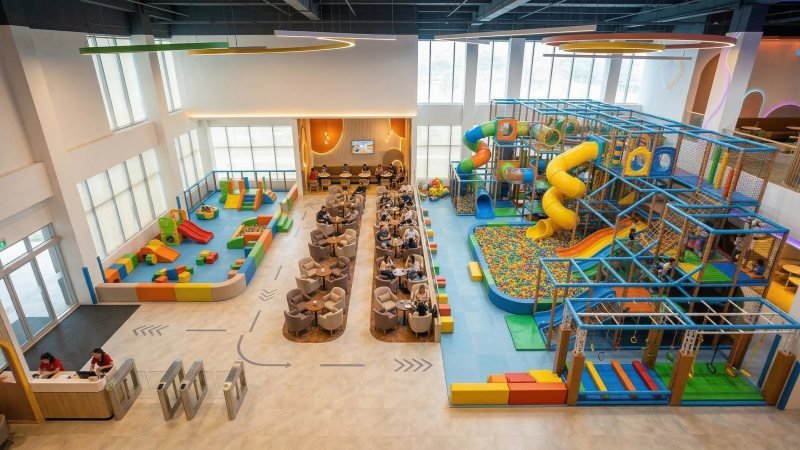
Engineering Traffic Flow to Prevent Bottlenecks
How do you keep hundreds of active children moving smoothly through a facility? You must engineer the traffic flow deliberately. Bottlenecks cause frustration, reduce capacity, and create poor customer experiences.
Design your main pathways to be wide and clearly defined. Establish distinct entrance and exit points for large, high-traffic play structures. This concept is similar to managing queue lines at a major theme park attraction. You need dedicated entry lanes and clear exit paths to prevent energetic crowds from colliding.
Main walkways typically require a minimum width of 48 to 60 inches to accommodate strollers and opposing foot traffic. However, local fire codes, ADA compliance, and specific equipment footprints can alter these dimensions. Always verify exact spatial clearances with your equipment supplier during the initial drafting phase to ensure compliance.
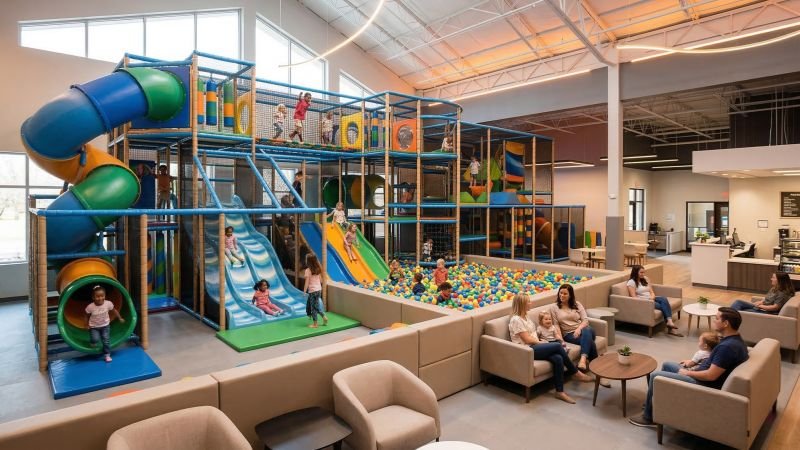
Maximizing Vertical Space with Multi-Level Architecture
Commercial floor space is expensive. The smart play? Building upward is the most cost-effective strategy to increase your center’s capacity. Multi-level architecture allows you to double or triple your play volume on the exact same square footage.
Just as multi-level laser tag arenas maximize tight square footage by building upward, multi-level play frames maximize your leased commercial space. A larger play volume means higher ticket sales without increasing your monthly rent.
A standard two-level play structure generally requires a minimum ceiling height of 10 to 12 feet. Meanwhile, a three-level system often demands 15 to 18 feet of vertical clearance. Note that these height clearances can vary significantly based on structural framing materials and overhead ceiling fixtures (like HVAC ducts). Please confirm exact height compatibility with your chosen manufacturer before signing a lease.
Strategic upward expansion can increase active play capacity by 40% to 60% compared to traditional, single-level floor plans.
Developing Immersive Themes and Visual Aesthetics
How can you transform a basic commercial space into an unforgettable world that keeps families coming back?
Developing immersive themes requires a cohesive blend of strategic color palettes, structural storytelling, and dynamic lighting. A visually engaging environment transforms standard play equipment into a premium destination, significantly increasing customer retention and brand recognition within the highly competitive family entertainment industry.
Selecting Color Palettes that Stimulate Activity
Colors directly influence human behavior and emotions. Because of this, your playground’s color scheme dictates the room’s overall energy level. Warm colors like red, orange, and yellow naturally stimulate physical activity and excitement. It makes perfect engineering sense that these vibrant hues are ideal for high-energy zones like ninja courses or sprint tracks.
Conversely, cooler tones like blue and green promote calmness and focus. You should apply these shades to relaxed, low-impact areas. Think of a modern arcade’s design. The flashing neon colors instantly signal high-stakes action. Similarly, your play center’s palette sets the behavioral tone before a child even touches the equipment.
Using color strategically also helps establish clear visual boundaries between different activities.
| Color Category | Psychological Effect | Ideal Placement in Play Centers |
|---|---|---|
| Warm (Red/Orange) | High energy, urgency, excitement | Main play frames, competitive courses |
| Cool (Blue/Green) | Calmness, focus, relaxation | Rest areas, reading corners, quiet zones |
| Neutral (Wood/White) | Grounding, modern, premium feel | Parent seating, cafes, transition walkways |
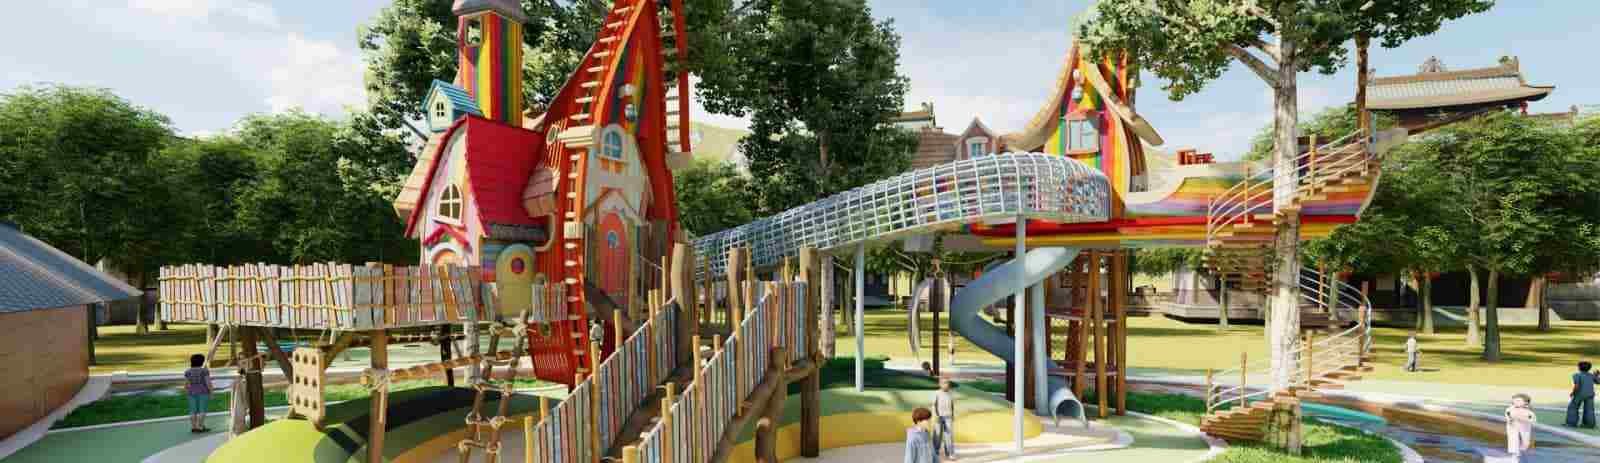
Incorporating Storytelling into Custom Structures
Children do not just want to climb; they want an adventure. Storytelling turns a standard spiral slide into a spaceship’s emergency escape pod. Incorporating a strong narrative into your custom structures creates a unique and memorable brand identity.
Are you just selling steel pipes and foam, or are you selling an experience? Industry data indicates that heavily themed Family Entertainment Centers (FECs) can often command 15% to 20% higher admission prices. Because you are selling an experience, not just physical equipment.
Compare a standard municipal playground to a major commercial theme park. Both utilize very similar mechanical engineering for their slides and climbers. However, the themed attraction wraps those mechanics in a compelling narrative, which vastly increases the attraction’s perceived value. You must apply this same principle to your indoor playground.
“A strong theme acts as a silent tour guide, naturally drawing children deeper into the play experience.”
Custom fiberglass or sculpted foam elements are often used to create these immersive environments. A well-executed thematic piece not only functions as play equipment but serves as a highly photogenic centerpiece that drives organic social media marketing for your facility.
Utilizing Lighting to Enhance the Play Environment
Lighting is the crucial final layer of your visual aesthetic. Proper illumination highlights your custom theming and ensures the commercial space feels premium.
You must avoid harsh, industrial fluorescent lighting at all costs. This type of lighting easily causes sensory fatigue and creates a sterile atmosphere. Instead, utilize dynamic LED fixtures to actively enhance your storyline. For instance, an ocean-themed zone benefits immensely from moving, water-ripple projection lights on the floor.
In dark ride attraction design, a beautiful fiberglass prop looks entirely flat without proper theatrical spotlights. Similarly, your physical play structures require specialized, multi-directional lighting to truly stand out.
Consider implementing these three distinct layers of lighting:
- Ambient Lighting: This provides the overall base illumination for the facility, ensuring safe navigation.
- Accent Lighting: This directional lighting highlights specific thematic elements, like a giant sculpted tree or a custom mascot.
- Interactive Lighting: These intelligent LED systems respond to children’s physical movements on the floor or walls.
Designing Age-Specific Play Experiences
How do you design a single facility that safely entertains both a crawling toddler and a highly active twelve-year-old?
Designing age-specific play experiences requires physically segmenting your commercial floor plan into specialized zones with scale-appropriate equipment. This strategic division ensures that toddlers can safely explore micro-level soft architecture, older children remain engaged through complex obstacle courses, and all guests can access inclusive, sensory-friendly layouts.
Structuring Soft Architecture for Toddlers
Toddlers between six months and three years old experience the world much differently than older children. As a result, they require a dedicated, enclosed environment. You must separate this area entirely from the high-traffic main play frames.
Structuring soft architecture for this age group focuses heavily on foundational motor skills. To handle this right, you should incorporate low-level crawlers, micro-slides, and soft foam rockers. Think of this zone like the gentle “kiddie ride” section of a major amusement park. The equipment operates at a lower intensity and keeps parents within arm’s reach at all times.
Beyond just the type of play, the scale of the equipment must perfectly match the child. Step heights in toddler zones generally range from 6 to 8 inches. Meanwhile, platform heights rarely exceed 3 feet. Because dimensional standards and foam density ratings can vary based on regional manufacturing guidelines, you should always verify the exact height and material specifications with your equipment supplier during the blueprinting phase.
Industry data highlights the financial importance of these spaces. Toddler zones typically occupy only 15% to 20% of a facility’s total footprint. However, they consistently drive the majority of weekday morning admissions. As a result, this specific zone boosts revenue during otherwise slow operating hours.
Blueprinting Dynamic Obstacle Courses for Older Children
Older children quickly lose interest in basic climbing structures. If you want to keep them engaged and off their screens, you must blueprint dynamic, high-energy obstacle courses to retain this highly profitable demographic.
Children aged eight to twelve seek competition and intense physical challenges. To meet this demand, you must integrate sequential features like ninja warrior courses, warped walls, and complex rope structures. Similar to how a commercial trampoline park relies on distinct challenge zones to maintain engagement, your indoor playground needs varied, difficult routes.
You can significantly increase repeat visitation by designing multiple pathways through the same structure. As a result, older children cannot easily memorize the course in a single visit, encouraging them to return.
| Feature Type | Target Age Group | Primary Physical Skill | Space Requirement |
|---|---|---|---|
| Micro-Slides & Rockers | 0-3 Years | Balance and Crawling | Low |
| Multi-Level Mazes | 4-7 Years | Spatial Awareness | High |
| Ninja Obstacle Courses | 8-12+ Years | Strength and Agility | Medium to High |
Crafting Inclusive and Sensory-Friendly Layouts
Modern commercial indoor playgrounds must welcome children of all physical and cognitive abilities. Crafting an inclusive layout is not just a moral obligation. It is also a smart business strategy that significantly expands your target market.
Inclusive design goes beyond simply adding a basic wheelchair ramp. It requires the thoughtful integration of ground-level play panels, zero-entry merry-go-rounds, and widened transfer stations. Just as modern family entertainment centers provide varied arcade game heights for different users, your physical structures must offer accessible engagement points.
Let’s not forget the details: sensory-friendly layouts are crucial for children with sensory processing differences. You should design specific quiet zones or “chill-out” pods away from the main playground noise. These areas often feature tactile play panels and acoustic-dampening materials.
“True inclusivity means a child in a wheelchair and a child running on foot can play side-by-side in the exact same structure.”
By proactively blueprinting these inclusive elements, your facility instantly becomes a preferred destination. Families who often struggle to find accommodating commercial entertainment venues will quickly become your most loyal customers.
Integrating Safety Engineering into Your Blueprint
How do you ensure your commercial playground design inherently protects children while minimizing liability risks?
Integrating safety engineering into your blueprint requires precise fall zone calculations, the strategic elimination of supervision blind spots, and the strict specification of compliance-tested materials. This proactive approach ensures that every structural element meets rigorous international safety standards before manufacturing begins, drastically reducing operational hazards and insurance premiums.
Calculating Fall Zones and Padding Requirements
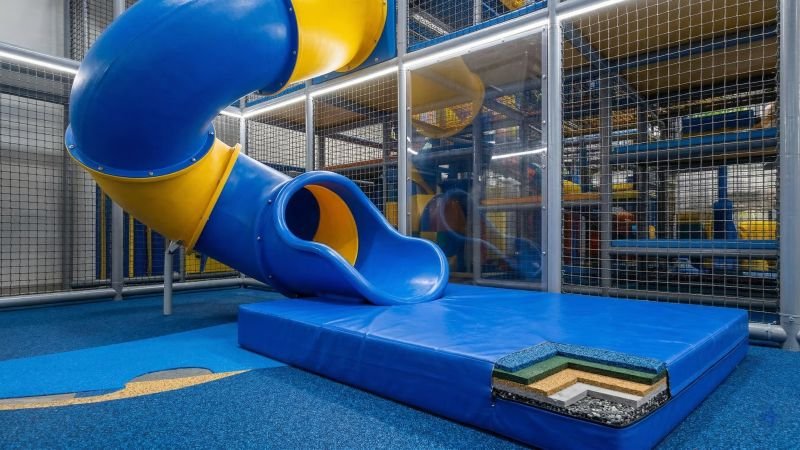
A beautiful floor plan is useless if it is unsafe. For any structural engineer, calculating fall zones is the most critical step in safety engineering. A fall zone, or use zone, is the designated surface area under and around a piece of equipment where a child might land if they fall.
You can compare a playground fall zone to the foam pit at the end of a commercial trampoline lane. The pit must provide enough depth and the right foam density to safely absorb the kinetic energy of a falling jumper. Similarly, your playground’s flooring must absorb the impact of a falling child.
To calculate this, engineers use a metric called Critical Fall Height (CFH). The CFH determines the maximum height a child can fall from without sustaining a critical head injury. Because of this hard metric, the thickness and density of your floor padding must strictly match the CFH of the equipment above it. For instance, a slide with a 4-foot deck requires a much thinner safety mat than an 8-foot climbing tower.
Because Critical Fall Height formulas and required foam densities can vary significantly based on local regulatory bodies (such as ASTM or EN standards), you must verify the exact padding thickness and material specifications with your equipment supplier during the initial drafting phase.
| Padding Material | Typical Application | Impact Absorption Level |
|---|---|---|
| High-Density EVA Foam Mats | Toddler zones, general walkways | Moderate |
| Poured-in-Place (PIP) Rubber | Base of high slides, climbing walls | High |
| Thick Crash Pads | Ninja courses, trampoline dismounts | Very High |
Designing Layouts to Eliminate Supervision Blind Spots
Even the safest equipment requires adult supervision. But what happens when your massive, 15-foot multi-level structure is full of hidden corners? We call these areas supervision blind spots, and they are a massive liability.
You must engineer your blueprint to eliminate these hidden zones entirely. Think about the security camera placement in a massive arcade hall. The cameras must have overlapping fields of view to monitor all the game cabinets. Similarly, your play structure needs open sightlines so staff and parents can constantly monitor the activity inside the maze.
How do you achieve this? First, replace solid interior walls with transparent polycarbonate panels or heavy-duty safety netting. Second, avoid creating deep, enclosed tunnels that bend sharply away from the main viewing areas. Instead, use straight pathways or clear bubble panels at the tunnel corners.
Industry case studies show that eliminating blind spots can reduce staff incident response times by over 40%. Furthermore, clear visibility drastically reduces instances of bullying or aggressive play, ensuring a better experience for all guests.
Specifying Compliance-Tested Materials in Initial Drafts
Safety engineering does not start during construction. It starts on paper. That’s exactly why you must specify compliance-tested materials directly in your initial drafts.
Do not simply label a surface as “foam” or “metal.” You must be specific. For example, specify that all structural framework must use galvanized steel pipe coated in anti-rust PVC. Just as you would specify commercial-grade, fire-resistant wiring for a high-tech laser tag arena, you must demand fire-retardant materials for your play structures.
The PVC vinyl used to cover the soft play elements must be strictly non-toxic, phthalate-free, and fire-retardant. The netting must possess specific tensile strength ratings to prevent tearing.
Because fire codes and toxicity regulations change frequently depending on your country and municipality, you must remind your project managers to verify the exact material certifications (such as CE, TUV, or ASTM certificates) with the manufacturer before approving the final blueprint. By locking in these safe materials early, you prevent costly redesigns and guarantee a secure play environment.
Navigating the 3D Rendering and Prototyping Process
Navigating the 3D rendering and prototyping process bridges the gap between conceptual design and physical reality. This critical phase identifies spatial conflicts, verifies load-bearing capacities, and aligns custom play features with precise manufacturing tolerances to prevent costly onsite installation errors.
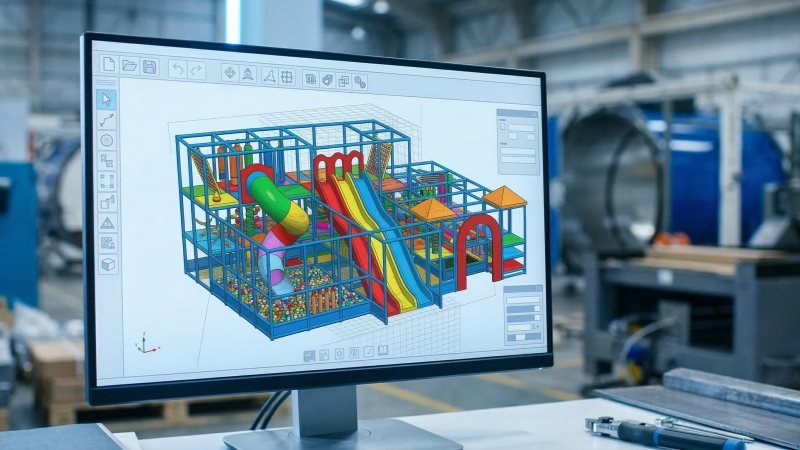
Translating 2D Concepts into 3D Visualizations
Let’s be clear: flat 2D blueprints simply map the length and width of your facility. However, a commercial multi-level play structure relies heavily on vertical space. For that reason, translating these flat concepts into 3D visualizations is absolutely essential.
This step acts exactly like the 3D CAD modeling used in commercial roller coaster design. A flat track map shows the general route. Yet, engineers need a 3D model to guarantee the coaster car clears every steel support column during a loop. Similarly, your playground’s 3D render ensures a spiraling tube slide will not hit the steel framework of an adjacent trampoline park structure.
Even better, this visualization phase allows you to digitally walk through the space to verify precise vertical clearances before cutting any metal. Industry case studies reveal a massive benefit to this process. Utilizing advanced 3D visualization software reduces structural modification costs during physical installation by up to 25%. Ultimately, seeing the volume of the space prevents expensive guesswork.
Refining Custom Features with Manufacturer Feedback
Here is the hard truth: a beautiful 3D model means nothing if a factory cannot physically build it. To prevent a manufacturing nightmare, you must refine your custom features using direct manufacturer feedback.
A designer might imagine a massive, sharply angled fiberglass treehouse. However, factory engineers understand the physical limitations of molding materials. This collaboration closely resembles the prototyping phase of a new arcade machine cabinet. A game designer might sketch a sleek, ultra-thin cabinet door. Yet, the physical manufacturer must step in to ensure the metal hinge can actually support the heavy coin-op mechanism.
Similarly, your playground manufacturer will adjust your custom digital shapes to ensure physical structural stability. They will assess load-bearing joints, evaluate material thickness, and ensure the design meets production standards.
| Design Element | Common 3D Concept | Manufacturer Refinement |
|---|---|---|
| Tube Slides | Extremely tight descending spirals | Widened drop angles to maintain safe sliding momentum |
| Fiberglass Props | Sharp, highly intricate edges | Smoothed corners for safe molding and tactile play |
| Steel Framing | Minimal vertical support posts | Added cross-bracing to meet strict commercial load tolerances |
Engaging your manufacturer early in this 3D phase is highly efficient. In fact, this early collaboration typically cuts overall prototyping time by an average of three weeks. Ultimately, this constant feedback loop transforms a digital dream into a viable, commercial-grade product.
Conclusion
At the end of the day, designing a commercial indoor playground is an intricate balance of creativity, spatial planning, and strict engineering. By meticulously drafting your floor plan to manage traffic flow, developing immersive visual themes to build your brand, and implementing scale-appropriate equipment for all ages, you create a destination that families will consistently return to. When you prioritize safety at the blueprint stage and actively collaborate with your manufacturer during the 3D rendering process, you eliminate costly errors and ensure your facility operates seamlessly from opening day.
If you are ready to turn your concepts into a fully realized, profitable playground, please contact us!