-
Whatsapp: +86 15516933785
-
Email: hanlin@hanlinplayground.com
-
Address: Shangjie District, Zhengzhou City, Henan Province, China
-
Whatsapp: +86 15516933785
-
Email: hanlin@hanlinplayground.com
-
Address: Shangjie District, Zhengzhou City, Henan Province, China

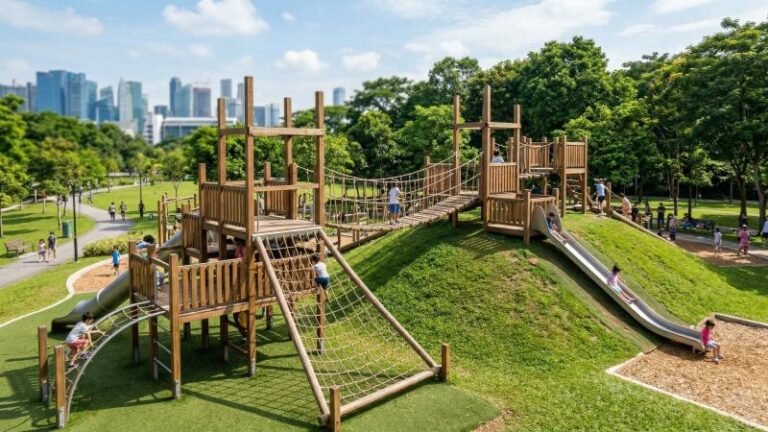
Commercial Outdoor Playground Equipment: 5 Key Safety Standards You Must Know

What are the critical safety standards required for commercial outdoor playground equipment to ensure legal compliance and child safety?
Commercial playground safety is governed by ASTM F1487 and CPSC guidelines, which mandate five essential standards: protective surfacing with proper critical fall height ratings, adequate use zones to prevent collisions, entrapment-free hardware design, distinct age-appropriate separation, and ADA accessibility. Compliance with these standards is required to minimize liability and ensure a safe environment for children.
Standard 1: Protective Surfacing and Impact Attenuation
Protective surfacing is widely considered the single most critical safety factor in modern commercial playgrounds, as falls account for the majority of injuries.
According to CPSC and ASTM F1292 standards, compliant protective surfacing acts as the primary defense against life-threatening head injuries. To meet this standard, the surfacing material must possess a Critical Fall Height (CFH) rating that equals or exceeds the highest accessible point of the play equipment, effectively absorbing impact shock to keep Head Injury Criterion (HIC) scores below 1000.
Critical Fall Height Requirements for Loose Fill Materials
In the playground industry, gravity is the primary concern. Therefore, the depth of your loose-fill material determines the safety level of the entire site. The Critical Fall Height (CFH) is not just a suggestion; it is a measurable limit. Specifically, if your slide deck is 8 feet high, your surfacing must be rated to protect a child falling from at least 8 feet.
Loose-fill materials, such as Engineered Wood Fiber (EWF) or rubber mulch, function similarly to a hydraulic shock absorber on heavy machinery. If the absorber does not have enough stroke length to compress, the energy transfers directly to the frame. Similarly, if loose fill is too shallow, the impact force transfers directly to the child.
Refer to the following data based on CPSC Publication 325, which outlines the protection provided by different materials at a compressed depth of 9 inches.
Fall Protection by Material Type (9-Inch Compressed Depth)
| Material Type | Critical Fall Height Protection |
|---|---|
| Engineered Wood Fiber (EWF) | Up to 10 feet |
| Rubber Mulch (Loose Fill) | Up to 10-12 feet (Varies by product) |
| Sand (Coarse/Fine) | Up to 4 feet |
| Pea Gravel | Up to 5 feet |
Note: Sand and pea gravel provide significantly less protection than EWF or rubber. Consequently, they are rarely recommended for equipment taller than 4 or 5 feet.
You must ensure that the fall height rating of the material always matches the tallest component on your structure.
Shock Absorbency Ratings for Unitary Surfaces
Unitary surfaces include poured-in-place (PIP) rubber, bonded rubber, and synthetic turf systems. Unlike loose fill, you cannot simply judge these by looking at their depth with a ruler. Instead, these systems rely on precise engineering to pass drop tests.
Two main metrics determine if a unitary surface is safe:
- HIC (Head Injury Criterion): This measures the likelihood of a head injury. The score must remain below 1000 during a drop test.
- G-Max: This measures the peak deceleration (stopping force) of the fall. This score must be less than 200.
Think of this like the hardness of a polyurethane wheel on a warehouse cart. A harder wheel lasts longer but vibrates more; a softer wheel absorbs bumps but wears faster. Unitary surfaces try to balance durability with the softness required to lower HIC scores.
The Role of the Wear and Base Layers
Unitary systems typically consist of two distinct layers. The top layer is the “wear course,” which provides durability and color. Underneath lies the “buffings” or base layer, which provides the actual shock absorption. The thickness of this base layer dictates the CFH rating.
Important: Because chemical binders and rubber granule density differ between manufacturers, a 2-inch surface from Supplier A may perform differently than a 2-inch surface from Supplier B. Always verify the specific lab test results for the exact system and depth you intend to purchase from your supplier.
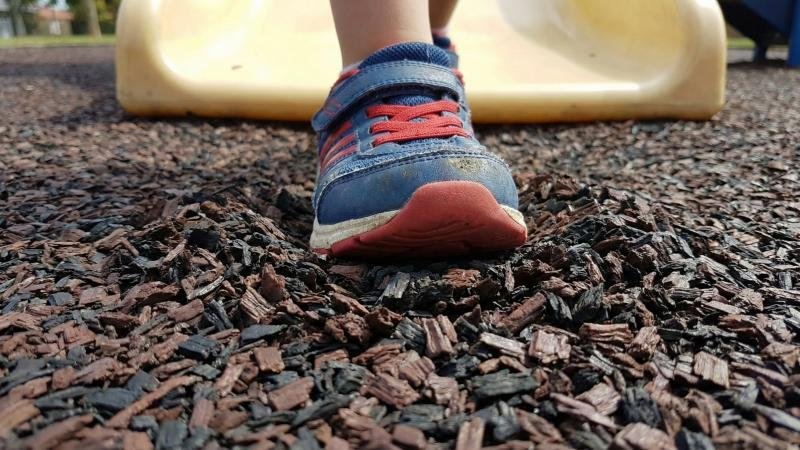
Proper Depth Maintenance for Wood Chips and Rubber Mulch
The biggest failure point for loose-fill surfacing is displacement. This phenomenon occurs when children run or land, kicking the material away from high-traffic areas. We call these “kick-out zones.”
Common kick-out zones include:
- The bottom of slide exits.
- Underneath swing seats.
- The base of fire poles or climbers.
If you install Engineered Wood Fiber, you must account for compaction. Over time, the wood fibers settle and knit together. To maintain a safe 9-inch protective layer, you typically need to install 12 inches of material initially. This is often referred to in the industry as the “compaction factor.”
Visual Indicators for Safety
To ensure depths remain compliant between professional audits, you should mark the equipment legs. A simple permanent marker line or a sticker on the support post can indicate the “finish grade” level. If the material drops below this mark, your maintenance team knows to rake material back into the area immediately.
Without this maintenance, a playground that was safe on opening day can become non-compliant and dangerous within a few weeks of heavy use.
Standard 2: Use Zones and Equipment Spacing Rules
Ensuring sufficient empty space around equipment is legally required to allow for safe movement and falls.
According to ASTM F1487 standards, the Use Zone is a designated area beneath and surrounding play equipment where a child might land, requiring a minimum extension of 6 feet in all directions from the equipment perimeter. This zone must remain completely free of hard obstacles and be surfaced with impact-attenuating material to prevent injuries from collisions or falls.
Minimum Clearance Zones for Fall Protection
The fundamental rule for playground layout is the “6-Foot Rule.” For most stationary equipment, such as climbing walls or overhead ladders, you must maintain a clear radius of 6 feet (1.8 meters) extending from the outermost edge of the structure.
Think of this like the safety clearance lines painted on a factory floor around a robotic arm. Even if the machine is stationary, the area around it is kept clear for operations. Similarly, the use zone allows a child to jump off, fall off, or simply exit the equipment without immediately hitting a bench, a fence, or another child.
Key Exception: For equipment meant for toddlers (ages 6-23 months), the use zone can sometimes be reduced to 3 feet, but this strictly depends on the specific design and height of the piece.
It is crucial to note that this zone extends strictly from the perimeter. If a climber has a protruding step, the 6-foot measurement starts from the tip of that step, not the center post.
Preventing Overlap Between Moving and Stationary Equipment
A common error in site planning involves overlapping use zones to save space. While ASTM standards allow some overlap, strict restrictions apply based on the type of motion involved.
Static vs. Dynamic Play
You must distinguish between “static” equipment (like a platform) and “dynamic” equipment (like a swing or merry-go-round).
- Static to Static: Two stationary structures, such as a playhouse and a climber, can share a use zone. Their 6-foot zones can overlap, meaning they can be placed 6 feet apart (instead of 12 feet).
- Static to Dynamic: You generally cannot overlap the use zone of a moving piece of equipment with a static one.
- Dynamic to Dynamic: Two moving pieces of equipment almost never share a use zone.
Consider a multi-deck system. If a child is running around a stationary deck, they are predictable. However, if a child is exiting a slide (dynamic motion), they are moving fast and cannot stop instantly. Therefore, the exit zone of a slide cannot overlap with the use zone of a nearby climber.
Overlap Permissibility Guide
| Equipment Relationship | Can Use Zones Overlap? | Minimum Distance Between Structures |
|---|---|---|
| Stationary & Stationary | Yes | 6 feet |
| Stationary & Moving | No | 9 feet (typically 6ft + existing zone) |
| Moving & Moving | No | Sum of both use zones |
Specific Buffer Requirements for Swings and Slides
Swings and slides generate high-velocity movement, requiring significantly larger use zones than stationary climbers.
Belt Swings (To-Fro Motion)
Swings require a large rectangular safety envelope because they operate like a pendulum. The width is standard, but the length depends entirely on the height of the “pivot point” (where the chain connects to the top bar).
The rule is 2 x Pivot Height in both the front and back of the swing.
- If the top beam is 8 feet high, the use zone extends 16 feet forward and 16 feet backward.
- Total length of the zone = 32 feet (plus the width of the structure).
Slide Exit Zones
Commercial rainbow dry slides and standard tube slides have a specific “exit region” rule. The use zone at the bottom of a slide is not just a standard 6-foot circle. It must extend to accommodate the forward momentum of the slider.
Calculation Formula:
For slides taller than 4 feet, the exit use zone length is usually Slide Height plus 4 feet.
- However, the maximum required exit zone is typically capped at 14 feet.
- The minimum exit zone is never less than 6 feet.
Furthermore, this exit area must be clear of all other equipment use zones. You cannot place a spring rider directly in front of a slide exit, even if it is 7 feet away, as this creates a collision hazard.
Standard 3: Hardware Hazards and Entrapment Prevention
Hardware configurations and specific gap measurements are often referred to as “silent killers” in safety audits because they are not immediately visible to the untrained eye.
According to ASTM F1487 and CPSC guidelines, entrapment occurs when an opening is large enough to allow a child’s body to pass through but small enough to trap their head, typically measuring between 3.5 and 9 inches. Hardware hazards involve protrusions that can entangle loose clothing strings, leading to strangulation. Prevention requires strict adherence to probe testing and protrusion gauge protocols on every component.
Protrusion Tests to Avoid Clothing Entanglement
A protrusion is not just a sharp edge; it is any component that projects from the equipment surface. While a bolt might look smooth, it can still be deadly if it acts like a hook. The primary danger here is “entanglement,” where a drawstring on a hood or jacket gets caught as a child slides or runs past.
Inspectors use a specialized set of projection gauges to test this. These gauges look like washers with specific hole diameters. If a bolt or hardware piece passes through the hole and projects too far beyond the face of the gauge, it fails.
The “Hook” Effect
The most dangerous type of protrusion is one that increases in size as it extends from the surface.
- Correct: A bolt head is rounded and sits flush.
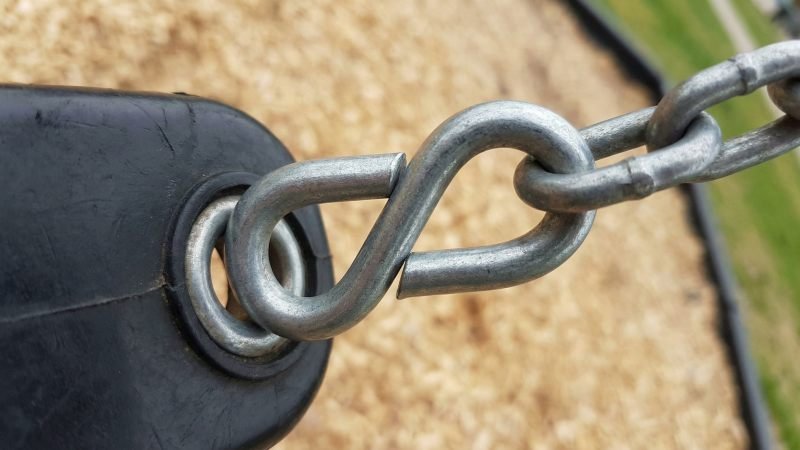
- Incorrect: An open “S-hook” on a swing chain.
Think of this like an open link in a lifting chain used in industrial rigging. If the link is not fully closed, it can inadvertently snag a nearby cable. Similarly, CPSC standards require that all S-hooks on swings be closed tightly so that a gap no larger than 0.04 inches remains—essentially the thickness of a dime.
Head and Neck Entrapment Probe Protocols
Entrapment is a specific mechanical hazard. It happens when a child enters an opening feet-first, their torso fits through, but their head gets stuck. This stops their feet from touching the ground, potentially causing strangulation.
To prevent this, the industry uses a “Go/No-Go” testing method similar to quality control gauges used in manufacturing parts. Two specific templates are used:
- The Torso Probe: A flat rectangular template (approx. 3.5 inches deep).
- The Head Probe: A large circular template (approx. 9 inches in diameter).
The Inspection Logic
The rule is simple: If the small probe fits, the large probe must also fit.
- Step 1: Insert the Torso Probe into an opening (e.g., between rungs on a ladder).
- Step 2: If it fits freely, you must try the Head Probe.
- Step 3: If the Head Probe cannot pass through, the opening is a fail. It is an entrapment hazard.
Common Entrapment Zones
| Location | Risk Description | Compliance Target |
|---|---|---|
| Ladder Rungs | Space between steps | Must be < 3.5″ or > 9″ |
| Deck Railings | Vertical slats | Must be < 3.5″ or > 9″ |
| Cargo Nets | Grid openings | Must not stretch to entrapment size |
Note: Generally, openings completely below 3.5 inches are safe because the child’s body cannot enter. Openings larger than 9 inches are safe because the head can slide out freely.
Crush and Shear Point Elimination in Moving Parts
Crush and shear points exist wherever two components move against each other. This is common in suspension bridges, merry-go-rounds, and seesaws.
Definitions:
- Crush Point: Two parts move toward each other (like a closing vise).
- Shear Point: Two parts move past each other (like scissors).
The danger is that a finger can be amputated or crushed if placed in the gap during motion. To test this, inspectors use a neoprene rod that mimics the compressibility of a child’s finger.
The Dowel Test
If an opening can admit a rod that is 0.1875 inches (3/16 inch) in diameter, it must also be wide enough to prevent crushing.
- If the gap closes down during movement, it must stop before it gets smaller than 0.5 inches.
- Alternatively, the gap must be guarded or covered so a finger cannot enter in the first place.
The Roller Slide Exception
Roller slides require specific attention. The space between the rolling logs can pinch fingers. Industry standards dictate that the gap between rollers must be minimal to prevent fingers from sliding in deep enough to be sheared by the rotation.
Standard 4: Age Appropriate Design Separation

Separating playground equipment by age group is a mandatory safety requirement to prevent injuries caused by developmental discrepancies.
According to CPSC Public Playground Safety Handbook guidelines, age separation prevents injuries, ensuring that smaller children do not access equipment requiring advanced motor skills or upper body strength. This practice segregates high-traffic zones for older children (ages 5–12) from low-speed zones for toddlers (ages 6–23 months) and preschoolers (ages 2–5), minimizing collision risks and fall hazards.
Distinct Zones for Toddlers Ages 6 to 23 Months
Children in this earliest developmental stage are just learning to balance, stand, and walk. Consequently, their play area requires a “clean room” approach, isolated from the chaos of older children. Equipment here relies on sensory exploration rather than physical exertion.
Designers typically classify this zone for children who have not yet developed the upper body strength to support their own weight. Therefore, you will almost never see overhead climbers or vertical sliding poles here. Instead, the focus is on ground-level activity.
Key Design Restrictions for Toddler Areas:
- Platform Heights: Surfaces are generally kept very low to minimize fall risks.
- Access Methods: Ramps and wide stairways with enclosed sides are preferred over ladders.
- Motion Equipment: Spring rockers and full-bucket swings are standard, but they must be scaled for smaller bodies.
Think of this like a quality control laboratory located next to a heavy manufacturing floor. The lab (toddler zone) needs a physical buffer to prevent the heavy forklifts (older kids) from accidentally driving through delicate operations. Ideally, you should use landscaping or fencing to create this barrier.
Separation Criteria for Preschool versus School Age Children
The most critical separation in commercial playgrounds occurs between the Preschool (2–5 years) and School Age (5–12 years) groups.
This separation is vital because the physical capabilities of a 10-year-old differ vastly from those of a 3-year-old. A 3-year-old has a high center of gravity and poor grip strength. In contrast, a 10-year-old moves with high velocity and seeks challenges. Mixing these groups creates a “highway merging” hazard, where fast traffic collides with slow traffic.
Equipment Suitability Comparison
| Feature | Preschool (2–5 Years) | School Age (5–12 Years) |
|---|---|---|
| Overhead Rings/Monkey Bars | Not Recommended (Lack of grip/strength) | Recommended (Builds upper body strength) |
| Vertical Sliding Poles | Not Recommended | Allowed |
| Spiral Slides | Limited (Must have <360° turn) | Allowed (Full 360°+ turns permitted) |
| Stair Riser Height | Maximum 7 inches | Maximum 8 inches |
Note: Specific dimension limits, such as stair heights or slide turns, may vary slightly depending on the specific update of the ASTM F1487 standard or local regulations. Always verify the current exact measurements with your equipment supplier.
The layout should clearly define these zones. You might place the 2-5 area closer to benches where parents sit, while the 5-12 area sits further back. This layout naturally filters children into the correct area based on their independence level.
Signage Requirements for Age Designation
Even if you design the perfect layout, you must explicitly tell users where to go. Compliance requires clear, visible signage.
ASTM F1487 mandates that manufacturers provide labels indicating the intended age group for the equipment. As the site owner, you must ensure these labels are installed and remain legible.
Essential Signage Elements:
- Intended Age Group: Clearly state “Ages 2–5” or “Ages 5–12”.
- Adult Supervision Warning: A reminder that supervision is recommended.
- Hot Surface Warning: A caution that metal or dark plastic can burn skin in direct sunlight.
Consider these signs as the “Operating Manual” or “Voltage Warning” stickers on a piece of industrial machinery. If an operator ignores the warning label and misuses the machine, the manufacturer has at least fulfilled their duty to warn. Similarly, if a parent allows a toddler onto a complex 5-12 climber despite a clear warning sign, the liability shifts because you provided the necessary safety information at the point of entry.
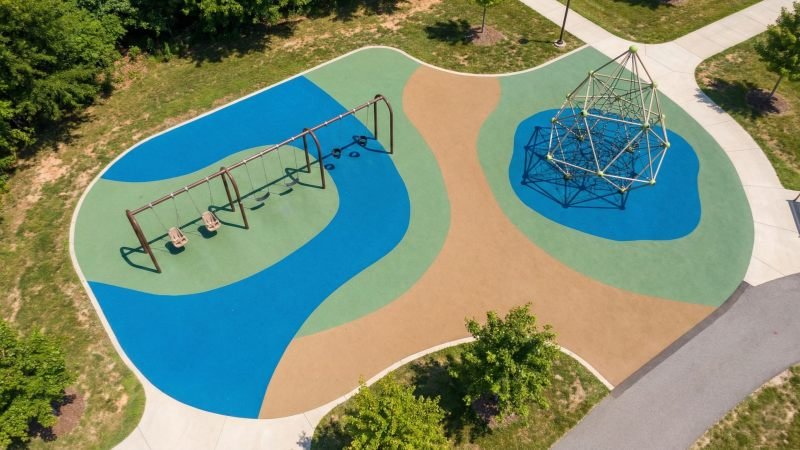
Standard 5: ADA Accessibility and Inclusive Design Compliance
True accessibility is determined by legal benchmarks that ensure a commercial playground is usable by children with physical disabilities.
According to the 2010 ADA Standards for Accessible Design, commercial playgrounds must provide an accessible route to at least 50% of elevated play components and a specific ratio of ground-level components. This ensures equitable access through firm, stable surfacing and structural transfer systems, allowing children with mobility devices to engage with the play environment.
Ground Level Play Component Routes and Ratios
Accessibility is not just about building ramps; it is about ensuring meaningful play happens at the ground level too. The Americans with Disabilities Act (ADA) mandates a balance between equipment located on decks (elevated) and equipment located on the ground.
Think of this like a multi-story logistics warehouse. You cannot put all the workstations on the mezzanine level if the elevator only holds one person. You must ensure that the ground floor is fully operational and productive. Similarly, you cannot force a child in a wheelchair to stay on the perimeter while everyone else plays above.
The “One of Each Type” Rule
You must include different types of activities at ground level. You cannot simply install three identical panels and call it compliant. You need variety, such as one musical panel, one solitary spinner, and one rocker.
Minimum Ground Level Requirements
The number of required ground components depends entirely on how many elevated components you have.
| Number of Elevated Components | Minimum Ground Level Components Required | Minimum Different Types Required |
|---|---|---|
| 0 to 1 | 0 | 0 |
| 2 to 4 | 1 | 1 |
| 5 to 7 | 2 | 2 |
| 8 to 10 | 3 | 3 |
| 11 to 13 | 4 | 3 |
Note: As the structure grows larger, the ratio shifts. Always consult the specific ADA chart provided by your equipment manufacturer during the design phase to ensure your count is accurate.
Transfer Systems and Ramps for Elevated Structures
To get a child from the ground to the upper decks, you generally have two mechanical options: ramps or transfer systems.
Ramps (The Preferred Access)
Ramps allow a child to stay in their wheelchair while reaching high points.
- Slope: The slope must not exceed 1:12 (one inch of rise for every 12 inches of run).
- Landings: You must provide flat landings at intervals to allow for resting and turning.
Transfer Systems (The Space Saver)
Ramps take up a massive amount of footprint space. Therefore, many compact playgrounds use a “Transfer Station.” This functions like a loading dock plate in a shipping bay. It bridges the gap between the wheelchair and the equipment.
A transfer system consists of:
- Transfer Platform: A low deck (typically 11 to 18 inches high) where the child can lift themselves out of their chair.
- Transfer Steps: Shallow stairs with handrails that allow the child to scoot up to the main deck using their arms.
Wheelchair Accessible Surfacing Standards
In Standard 1, we discussed surfacing for impact absorption (ASTM F1292). However, for accessibility, we must also look at ASTM F1951.
This standard tests the “maneuverability” of a surface. It measures the work force required to push a wheelchair across the material.
The Forklift Analogy
Imagine driving a warehouse forklift. It moves effortlessly on smooth concrete. Now, imagine driving that same forklift into deep, loose gravel. The wheels sink, and the machine gets stuck.
This is exactly what happens with improper playground surfacing.
- Loose Fill (Sand/Pea Gravel): These are never ADA compliant because wheels sink immediately.
- Engineered Wood Fiber (EWF): This is considered compliant only if it is properly compacted and maintained. However, it can still be difficult to navigate.
- Unitary Surfaces (Rubber Tiles/Poured-in-Place): These offer the best accessibility. They provide a firm, stable road surface that allows wheels to roll with minimal resistance.
The Accessible Route
You must ensure a clear path of travel (at least 60 inches wide for turning spaces) connecting the entrance of the playground to the transfer stations and ground-level components. If you use loose fill, you must constantly rake and tamp the path to keep it firm enough to pass the ASTM F1951 test.
Ensuring Long Term Compliance Through Maintenance

Passing an initial safety inspection does not guarantee that a commercial playground will remain safe indefinitely.
According to the National Recreation and Park Association (NRPA), safety is not a one-time achievement but a continuous cycle. To maintain compliance with ASTM F1487, site owners must implement a tiered inspection schedule involving daily visual checks for hazards and comprehensive annual audits. Failure to document these ongoing maintenance efforts can void warranties and significantly increase liability exposure in the event of an accident.
Frequency of High Wear Part Checks
Equipment does not break randomly; it deteriorates over time due to friction and use. Therefore, you must prioritize the inspection of “moving parts.” These components bear the weight and motion of the children, similar to how bushings and bearings function in industrial machinery.
The “50% Rule” for Hardware
The most critical items to check are S-hooks, shackles, and swing chains. As metal rubs against metal, the material slowly erodes.
Industry best practices suggest a strict replacement threshold:
- If a link or hook has lost 20% to 30% of its original diameter, you should order a replacement.
- If wear reaches 50% or more, you must remove the equipment from service immediately.
Think of this like the lifting chains on a shop crane. If a chain link becomes thin from constant use, the safe working load drops drastically. You wouldn’t lift a heavy engine with a worn chain, and you shouldn’t let a child swing on one either.
Moving Parts Inspection Checklist
| Component | What to Look For | Action Required |
|---|---|---|
| Swing Hangers | Excessive squeaking or grinding | Grease bushings or replace bearings |
| S-Hooks | Gaps opening up (>0.04″) | Close gap with pliers or replace |
| Pivot Points | Lateral “slop” or looseness | Tighten bolts or replace nylon bushings |
| Tube Slides | Cracks at flange connections | Tighten hardware or patch plastic |
Note: Replacement intervals for bearings and specialized distinct hardware can vary by brand. Always check your specific manufacturer’s maintenance manual for exact wear tolerances.
Scheduling Certified CPSI Audits
Your regular maintenance staff is excellent for daily tasks like emptying trash or spotting broken glass. However, they may not have the specialized training to identify subtle compliance violations, such as entrapment hazards or protrusion failures.
This is why you need a Certified Playground Safety Inspector (CPSI).
A CPSI is a professional certified by the NRPA to perform high-level safety audits. Think of your maintenance staff as the machine operator who keeps the unit clean daily. In contrast, the CPSI is the external Quality Assurance auditor who comes once a year to verify the entire system meets federal regulations.
The Annual Audit
You should schedule a comprehensive audit at least once per year. During this visit, the CPSI will use the official probes and gauges mentioned in Standard 3 to test every opening and gap.
They look for “creeping” non-compliance issues, such as:
- Bolt threads that have become exposed due to vibration.
- Drainage issues causing structural rot underground.
- Plastic degradation caused by UV exposure.
After the audit, you will receive a detailed report. You must treat this report as a mandatory work order to fix any high-priority hazards immediately.
Documentation and Logbook Best Practices
In the world of liability and insurance, there is a common saying: “If it wasn’t written down, it didn’t happen.”
You might repair a broken swing seat ten minutes after it breaks. However, if you do not record that action, you have no proof of your diligence. A well-maintained logbook is your primary defense against negligence claims.
What to Record
Your maintenance log should function like a “Shift Handoff” log in a factory. It needs to tell the story of the equipment’s health.
Every entry must include four key data points:
- Date and Time of the inspection.
- Name of the inspector.
- Issue Found (be specific).
- Corrective Action Taken (most important).
Example Log Entry:
- Date: Oct 12, 2023
- Item: Bay 2 Swing Chain
- Issue: Chain link worn 40% at the top hanger.
- Action: Removed swing seat. Installed new galvanized chain. Re-measured ground clearance (18 inches). Safe for use.
Digital vs. Physical Logs
While paper binders are traditional, many facility managers now use digital asset management apps. These allow staff to upload photos of the repair directly to the server. Whether digital or paper, you should generally keep these records for the entire lifespan of the equipment.
Conclusion
Understanding commercial outdoor playground equipment safety standards is not just about avoiding fines; it is about building trust with your community. By adhering to the 5 key standards—from proper surfacing and use zones to preventing entrapment and ensuring ADA accessibility—you create a foundation for safe, inclusive play.
However, installation is only the beginning. The long-term safety of your site relies heavily on the maintenance protocols discussed above. By combining high-quality equipment with rigorous documentation and annual CPSI audits, you ensure that your playground remains a joyful asset rather than a liability. Always prioritize safety in your design and maintenance routine to protect the well-being of the children who depend on it.