-
Whatsapp: +86 15516933785
-
Email: hanlin@hanlinplayground.com
-
Address: Shangjie District, Zhengzhou City, Henan Province, China
-
Whatsapp: +86 15516933785
-
Email: hanlin@hanlinplayground.com
-
Address: Shangjie District, Zhengzhou City, Henan Province, China
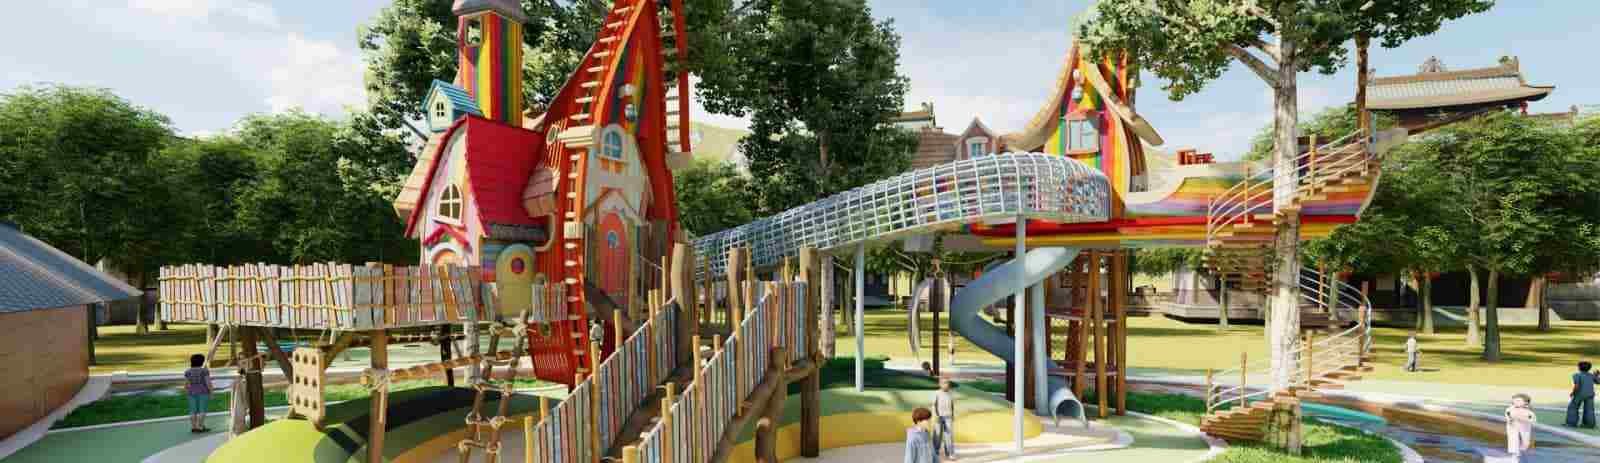
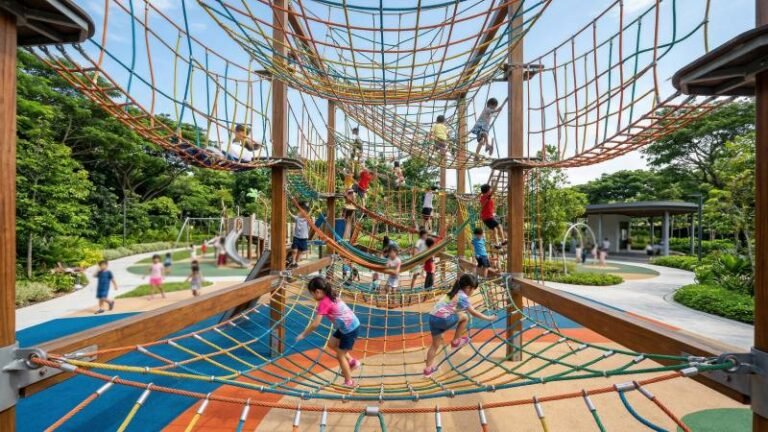
Outdoor Playground Flooring: The Ultimate Guide to Safety, Materials, and Cost
What factors should be prioritized when selecting outdoor playground flooring to ensure safety, compliance, and long-term value?
The selection of outdoor playground flooring must prioritize Critical Fall Height (CFH) ratings to prevent head injuries and compliance with ASTM F1951 for ADA accessibility. While unitary surfaces like poured-in-place rubber offer superior durability and low maintenance for high-traffic community parks, loose-fill options like engineered wood fiber provide a cost-effective alternative for projects with strict initial budget constraints.
Essential Performance Standards for Safety and Durability
What are the primary performance standards that determine if outdoor playground flooring is safe and durable enough for public use?
The primary performance standards for commercial outdoor playground equipment flooring are ASTM F1292 for impact attenuation and ASTM F1951 for accessibility. These benchmarks verify that the surface can sufficiently absorb shock to prevent life-threatening head injuries and provides a firm, stable foundation for wheelchair navigation.
Understanding Critical Fall Height Ratings
Safety is the absolute priority in playground design. Understanding these safety standards is crucial. The most important metric you will encounter is the Critical Fall Height (CFH) rating. This rating measures the vertical distance from a designated play surface (like a slide platform) to the protective surfacing below.
Why do we obsess over this number? The goal is to prevent serious head injuries. When a child falls, the flooring acts like a shock absorber on an industrial machine. Just as a machine’s dampener absorbs vibration to protect the equipment, the flooring absorbs kinetic energy to protect the child’s brain. If the flooring is too hard, the energy transfers directly to the child.
The Relationship Between Equipment and Surface
You must match the CFH rating of your flooring to the highest point of your equipment. For example, if you have a monkey bar set that is 8 feet high, your flooring must be rated for a fall of at least 8 feet.
Engineers determine this rating using a test called the HIC (Head Injury Criteria). They drop a specialized instrument resembling a human head from various heights. They measure how fast the “head” stops upon impact. A lower score means better shock absorption.
Table: Example Correlation Between Equipment Height and Flooring Requirements
| Maximum Equipment Height | Required Surface Rating (CFH) | Safety Implication |
|---|---|---|
| 4 Feet | 4 Feet or higher | Prevents critical injury from low platforms. |
| 6 Feet | 6 Feet or higher | Standard for many swings and climbers. |
| 8 Feet | 8 Feet or higher | Required for tall slides and upper-body equipment. |
Note: The specific thickness required to achieve these ratings varies significantly based on the manufacturer and material density. Always verify the specific test reports to ensure the product meets your equipment’s height requirements.
ASTM Standards and ADA Accessibility Compliance
But simply passing the drop test isn’t the finish line. Playground flooring must also meet strict regulatory standards. In the United States, ASTM International sets these technical rules.
Key ASTM Standards
The most referenced standard is ASTM F1292. As mentioned previously, this standard dictates the impact attenuation (shock absorption) methods. However, simply passing this test once is not enough. The surface must maintain this performance over time and under different temperatures.
Another vital standard is ASTM F1951. This determines if a surface is accessible for people with disabilities. This is crucial for compliance with the Americans with Disabilities Act (ADA).
To understand this, picture the difference between a paved warehouse floor and a loose gravel lot. A forklift moves easily on the pavement because it is firm and stable. On gravel, the wheels sink, requiring excessive force to move. ASTM F1951 tests this “rolling resistance.”
The “Firm and Stable” Requirement
For a surface to be ADA compliant, a wheelchair user must be able to cross it without using too much energy.
- Firmness: The surface resists deformation when weight is applied.
- Stability: The surface remains unchanged after external force is applied.
Loose-fill materials often struggle here. If the material shifts easily underfoot, it may fail the stability test. This makes the playground unusable for children with mobility devices. Therefore, checking for the ASTM F1951 certification is mandatory for public spaces like schools and municipal parks.
Weather Resistance and Drainage Capabilities
Your playground isn’t just dealing with kids; it’s fighting the weather 24/7. UV rays, rain, and temperature fluctuations can degrade a surface rapidly if it lacks proper resistance properties.
UV Stability and Structural Integrity
The sun is a major enemy of synthetic flooring. UV radiation attacks the chemical bonds in binders and colors. This is similar to how an old dashboard in a car cracks after years in the sun.
- Brittleness: If the surface loses flexibility, it creates a hard impact zone. This ruins the fall height rating.
- Chalking: The surface may break down into a powder, causing a mess and reducing thickness.
Drainage and Permeability
Water accumulation creates safety hazards. Standing water leads to moss, algae, and slippery conditions. Therefore, the permeability rate of the flooring is a critical technical spec.
The flooring should function like a commercial storm drain system. It needs to allow water to pass through strictly at a rate that matches the rainfall.
- Permeable Systems: Water flows directly through the material into the ground. This prevents puddles on top.
- Impermeable Systems: These rely on a slope to shed water off the side. If the slope is incorrect, water pools.
Note: Drainage performance relies heavily on the sub-base preparation underneath the flooring. Ensure your grading plan accounts for the specific flow requirements of your chosen surface.
Detailed Comparison of Top Playground Surfacing Materials
Which playground surfacing material offers the best balance of safety, functionality, and aesthetic appeal for your specific project needs?
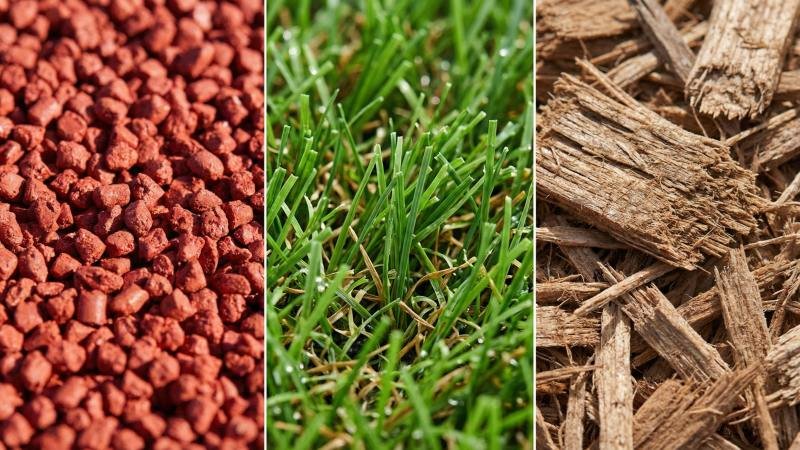
The best playground surfacing material depends on the site’s specific usage intensity and design goals. Poured-in-place rubber offers the highest accessibility and customization for high-traffic public parks. Interlocking tiles provide a practical modular solution for smaller, flat areas. Artificial turf delivers a natural look with high durability, while engineered wood fiber remains the standard for budget-conscious projects requiring certified impact protection.
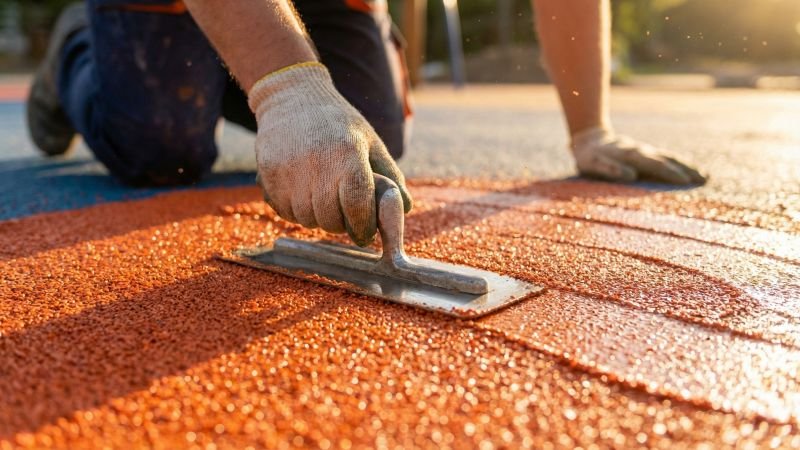
Poured-in-Place Rubber for Seamless Safety
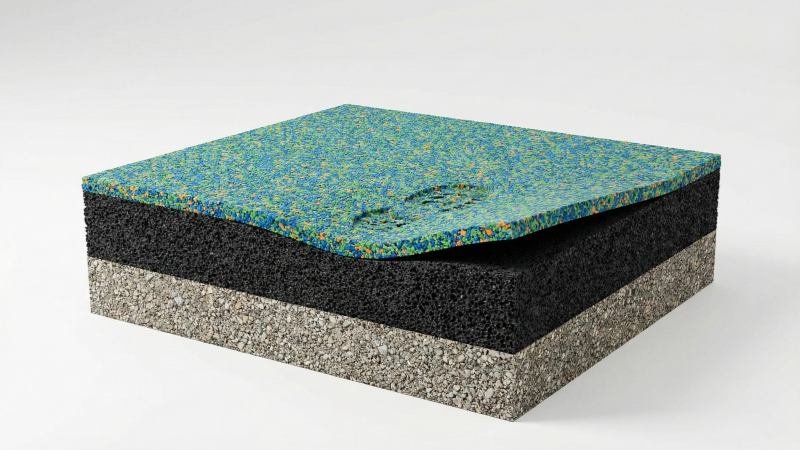
Poured-in-place (PIP) rubber is widely considered the “gold standard” for modern commercial playgrounds. This system consists of two distinct layers mixed on-site with a polyurethane binder. The base layer provides shock absorption, while the top “wear layer” provides durability and color.
Think of PIP surfacing like laying a specialized asphalt road, but instead of hard stone and tar, you are using soft rubber granules and glue. Once it cures, it forms a continuous, solid surface. Because there are no seams, there are no gaps for debris to hide in or for children to trip over.
This material allows for incredible design freedom. Installers can create hills, mounds, and intricate graphical patterns directly into the floor. There is a catch, though: because the rubber is mixed chemically on-site, the curing process is sensitive to temperature and humidity.
Interlocking Rubber Tiles for Modular Flexibility
Rubber tiles offer a factory-molded alternative to the wet-pour system. These are pre-manufactured squares, typically 2 feet by 2 feet, that lock together like robust industrial floor pavers.
Why choose tiles over a wet pour? Consistency. Since the tiles are made in a factory, the density and thickness are uniform across every square inch. There is no risk of an installer spreading the mixture too thin in one spot. This modular nature also allows for easier repairs. If one tile gets damaged by vandalism, you can often unlock it and replace it without resurfacing the entire area.
But here is the weak link: the seams. Over time, temperature changes cause rubber to expand and contract. This can create gaps between the tiles where dirt collects. In severe cases, the edges may curl up, creating a tripping hazard similar to an uneven sidewalk slab.
Bonded Rubber Mulch for Natural Aesthetics
Bonded rubber mulch bridges the gap between loose-fill materials and solid surfaces. It uses shredded rubber pieces that look like traditional wood chips, but they are coated in a binder and troweled into place.
Unlike the two-layer PIP system, bonded mulch is often installed as a single layer. This gives it a more textured, rustic appearance that blends well with park settings or nature trails. It mimics the look of a forest floor, making it ideal for a natural wooden playground setting, without the mess of loose chips getting kicked out of the play area.
Because the surface is highly textured, it provides excellent slip resistance. However, this same texture can be abrasive if a child falls and slides on bare skin. It is generally less dense than solid rubber surfaces, offering a softer feel underfoot.
Artificial Grass Turf for Low Maintenance Greenery
Don’t mistake this for a simple carpet of fake grass. Modern playground turf is a complex system. To be safe for playgrounds, the turf must be installed over a dedicated foam shock pad or a cushioning underlayment. The grass itself is merely the aesthetic top layer; the safety comes from what is underneath.
This material is excellent for creating a sensory-rich environment that looks natural but requires no watering or mowing. It solves the “muddy playground” problem instantly. High-quality systems use an infill—often sand or antimicrobial acrylic beads—to weigh the grass down and keep the blades standing upright.
One specific challenge with turf is heat retention. Synthetic fibers absorb heat and can become significantly hotter than the surrounding air on sunny days. Additionally, static electricity can build up on the plastic blades, which may be bothersome to some users with sensitive hearing aids or cochlear implants.
Engineered Wood Fiber as a Budget-Friendly Solution
Engineered Wood Fiber (EWF) is distinct from the landscaping mulch you buy at a garden store. It is processed mechanically to create fibrous, jagged strands rather than chunky chips.
The unique shape of EWF allows the fibers to knit together once compacted. When installed correctly, they form a “mat” that is firm enough to walk on, differentiating it from standard wood chips that stay loose and roll underfoot. This knitting effect helps it meet basic accessibility standards, though it is never as accessible as solid rubber.
Here is the operational reality of loose-fill: it moves. Under high-traffic areas like the bottom of a slide or under swings, the material will get “kicked out,” creating deep dishes. These depressions reduce the depth of the material, compromising the fall protection rating in the exact spot where a child is most likely to land.
Table: Quick Comparison of Material Characteristics
| Material | Surface Texture | Key Limitation | Best Use Case |
|---|---|---|---|
| Poured-in-Place | Smooth, Granular | Permanent; hard to repair invisibly | High-traffic accessible parks |
| Rubber Tiles | Firm, Seamed | Seams can separate over time | Flat, square play areas |
| Bonded Mulch | Rough, Rustic | Abrasive texture on skin | Nature trails, landscape paths |
| Artificial Turf | Soft, Grass-like | Retains heat in direct sun | Sensory gardens, multi-use areas |
| Eng. Wood Fiber | Loose, Fibrous | Displaces (Kick-out zones) | Large areas with tight budgets |
Cost Analysis: Upfront Investment vs Long-Term Value
How do the initial installation costs of various playground surfaces compare to their long-term financial requirements?
The total cost of playground flooring is a combination of the upfront installation price and the cumulative maintenance expenses over its lifecycle. Loose-fill materials like engineered wood fiber typically have the lowest entry cost ($3–$6 per sq. ft.) but require frequent, costly replenishment. Conversely, unitary systems like poured-in-place rubber command a higher initial investment ($15–$25+ per sq. ft.) but offer significant savings through minimal maintenance and longer replacement intervals.
Initial Material and Installation Costs per Square Foot
Price is usually the first question clients ask. However, this number is heavily influenced by the required thickness of the surface. A playground with high equipment requires thicker flooring to meet safety standards, which increases the volume of material needed.
Engineered Wood Fiber (EWF) is consistently the most affordable option upfront. It is strictly a raw material cost with minimal processing compared to synthetics.
- Cost Range: Approximately $3.00 to $6.00 per square foot installed.
- Variable: The cost rises if you need to install a complex drainage system underneath it.
Interlocking Rubber Tiles represent a mid-range investment.
- Cost Range: Approximately $8.00 to $16.00 per square foot.
- Variable: Thicker tiles needed for higher fall heights will push the price toward the upper end.
Poured-in-Place (PIP) Rubber and Artificial Turf are premium investments.
- Cost Range: Typically $15.00 to $25.00+ per square foot.
- Variable: PIP prices fluctuate based on the color ratio (black rubber is cheaper than colored granules) and local labor rates.
Please note that raw material prices, particularly for rubber and petroleum-based binders, fluctuate globally. Obtaining a current quote valid for your specific region and project timeline is essential.
Lifespan and Replacement Cycles of Different Surfaces
You have to run the numbers: how many times will you re-buy this floor over the playground’s life? A cheap surface that needs total replacement every few years may cost more than a durable surface that lasts a decade.
Unitary Surfaces (Rubber and Turf)
These materials are designed for longevity. A high-quality Poured-in-Place surface typically lasts 10 to 15 years. However, the “wear layer” (the top cap) may need a “re-top” after 7 or 8 years in high-traffic zones. This is similar to resurfacing a tennis court; you keep the base but refresh the surface.
Loose-Fill Surfaces (EWF)
Wood fiber does not have a static lifespan because it decomposes. Organic wood breaks down due to moisture and microbial activity.
- Decomposition Rate: You lose volume every year.
- Compaction: Foot traffic compresses the air pockets, reducing the cushion depth.
- Replacement: While you rarely remove all the old wood, you are in a constant cycle of “replacement” by adding new material.
Table: Expected Lifespan Before Major Intervention
| Surface Type | Expected Lifespan | Primary Failure Mode |
|---|---|---|
| Poured-in-Place | 10–15 Years | Hardening, cracking, or granulation |
| Rubber Tiles | 10–15 Years | Curling edges or separation at seams |
| Artificial Turf | 8–12 Years | Fiber matting (flattening) or seam failure |
| Eng. Wood Fiber | 2–3 Years (Top-up) | Decomposition and displacement |
Hidden Costs in Routine Maintenance and Repairs
This is where OpEx budgets often bleed. Many facility managers overlook the operational budget required to keep the playground legal and safe.
The “Top-Off” Cost of Loose Fill
The biggest hidden cost belongs to Engineered Wood Fiber. To maintain compliance with ASTM fall height standards, you must maintain a specific depth (usually 9 or 12 inches).
- Kick-out Effect: Children push mulch out of the play area.
- The Cost: You must purchase fresh fiber, pay for delivery, and pay labor to spread it. Over a 10-year period, these top-offs can equal the cost of the original installation.
Repairing Unitary Surfaces
Rubber surfaces are low maintenance, but they are not “no maintenance.”
- Patch Kits: Vandalism or heavy wear under swings can create holes. A professional patch kit costs money, though significantly less than a mulch top-off.
- Cleaning: Turf and rubber require occasional deep cleaning or sanitizing to remove grime, which may require renting specialized equipment.
Is it smarter to pay for the gravel access road (EWF) that requires constant grading and top-ups, or the concrete driveway (PIP) that costs more upfront but serves for years? The former is an ongoing headache; the latter is a capital investment.
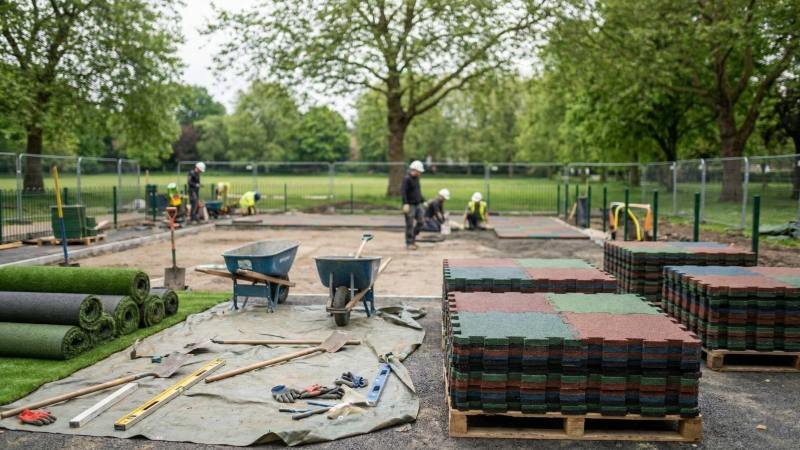
Installation and Site Preparation Guidelines
What are the critical steps for properly installing outdoor playground flooring to ensure long-term stability and safety compliance?
Successful playground flooring installation requires a stable, compacted sub-base with a 1% to 2% drainage slope to prevent water accumulation. While loose-fill materials and interlocking tiles offer DIY potential, unitary systems like poured-in-place rubber demand professional installation to ensure proper chemical bonding and adherence to warranty standards.
Evaluating Sub-Base Requirements and Grading
If the ground underneath fails, the safety surface on top fails. Period. You cannot simply lay expensive flooring over grass or dirt.
Concrete and Asphalt Bases
For unitary surfaces like Poured-in-Place rubber or bonded tiles, a hard surface is ideal. Concrete or asphalt provides a consistent, rigid platform. This prevents the surfacing from sinking or warping over time.
- Concrete: Typically requires a 4-inch thickness with wire mesh reinforcement.
- Asphalt: Must be fully cured (often 30 days) before applying rubber to prevent chemical reactions.
Compacted Crushed Stone
For artificial turf or engineered wood fiber, a crushed stone base is the standard industry solution. This involves excavating the native soil and replacing it with layers of aggregate.
- Excavation: Dig out organic soil that holds water.
- Geotextile Fabric: Lay this separation fabric to stop weeds and prevent stone from mixing with mud.
- Compaction: Use a vibrating plate compactor to turn the loose stone into a rock-hard surface.
Think of this like building a road. Before laying the blacktop, crews spend days compacting the gravel beneath. If they skip this, the road develops potholes immediately. Similarly, a playground sub-base must be 95% compacted density.
Importance of Grading
Water is the enemy of playground surfacing. The sub-base must have a gentle slope to guide water away. Industry best practice usually dictates a slope of roughly 1% to 2%.
Professional Installation vs DIY Options
Deciding whether to hire a crew comes down to one thing: risk. Choosing between hiring a crew or doing it yourself depends heavily on the material complexity and warranty implications.
Professional Installation (Required for Unitary Systems)
Systems involving chemical binders, such as Poured-in-Place rubber or Bonded Rubber Mulch, require professional installers. These materials are sensitive to humidity and temperature. A professional crew knows exactly how to trowel the mixture to achieve a level surface before it hardens.
- The Skill Set: It is similar to finishing concrete. You have a limited time to work the material before it sets permanently.
- Warranty: Most manufacturers void the warranty if a certified installer does not handle the chemical mixing.
DIY Options (Feasible for Modular/Loose Systems)
Interlocking tiles and Engineered Wood Fiber (EWF) are much friendlier for facility managers or community volunteers.
- Rubber Tiles: These connect using plastic dowels or clips. If the sub-base is flat, laying them is straightforward.
- EWF: This involves spreading the material with rakes and shovels. It requires physical labor but no specialized technical skill.
Table: Installation Complexity by Material
| Material | Difficulty Level | Specialized Tools Needed? | Recommended Installer |
|---|---|---|---|
| Poured-in-Place | High (Expert) | Screeds, Mixers, Trowels | Certified Contractor |
| Bonded Mulch | High (Expert) | Mixers, Lubricated Trowels | Certified Contractor |
| Artificial Turf | Medium | Carpet Kickers, Seam Tape | Professional / Skilled DIY |
| Rubber Tiles | Low | Utility Knife, Rubber Mallet | DIY / Handyman |
| Wood Fiber | Low | Rakes, Shovels | DIY / Volunteers |
Edging and Containment Systems for Loose-Fill Materials
If you choose a loose-fill material like Engineered Wood Fiber or rubber mulch, you must contain it. Without a border, the material will migrate onto sidewalks or grass, reducing the safety depth in the play zone.
Concrete Curbs
A poured concrete curb is the most durable solution. It acts as a permanent retaining wall.
- Flush Install: The top of the curb is flush with the surrounding landscape.
- Raised Install: The curb sits higher, creating a distinct boundary.
Plastic and Rubber Timbers
These are modular borders that spike into the ground. They are cheaper than concrete and easier to install.
- Flexibility: Rubber timbers can bend to create curved playground borders.
- Safety profile: They are softer than concrete, reducing injury risk if a child trips on the edge.
ADA Ramps and Access Points
You cannot simply build a wall around the playground; you must provide access. For ADA compliance, you need a transition ramp that allows a wheelchair to roll from the sidewalk down into the playground surface.
- Integration: The ramp must be securely attached to the border system.
- Flush Transition: There should be no “lip” or step greater than half an inch between the ramp and the sub-base.
Consider the containment system similar to the formwork used for pouring concrete. It defines the boundaries and holds the structural material in place. If the formwork (edging) bows or breaks, the material shifts, losing its required depth and structural integrity.
Maintenance Best Practices for Longevity
What are the essential maintenance protocols required to keep outdoor playground flooring safe and visually appealing for years?
Proper playground flooring maintenance requires a disciplined schedule of daily debris removal, monthly structural inspections, and immediate spot repairs. Facility managers must prioritize keeping drainage systems clear to prevent moss growth, regularly raking loose-fill materials to maintain safety depths, and using manufacturer-approved patch kits to seal cracks in unitary surfaces before they expand.
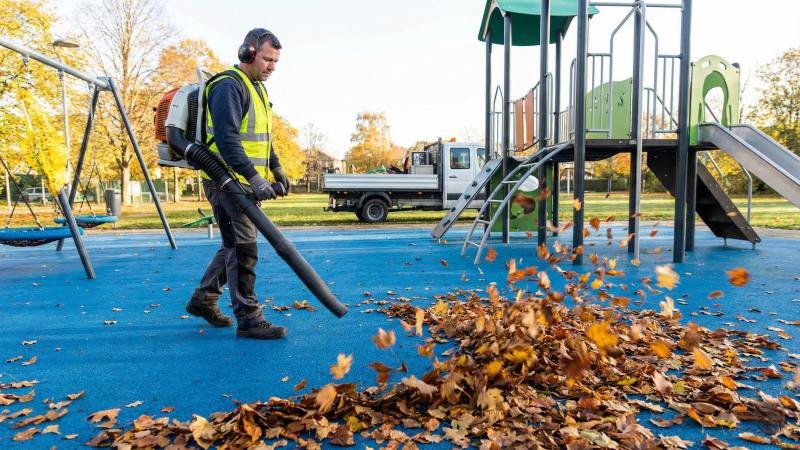
Routine Cleaning and Debris Removal Protocols
Dirt isn’t just unsightly; it’s the enemy of your investment. If leaves, twigs, or sand accumulate on Poured-in-Place rubber or turf, they trap moisture. This trapped moisture creates a breeding ground for moss, algae, and mold, which can make the surface dangerously slippery.
The Blower Method
For daily or weekly cleaning, a backpack leaf blower is the standard tool. It effectively removes loose material from the surface pores without damaging the texture. This is similar to blowing sawdust off a workbench; you want to remove the contaminants before they get ground into the surface.
Washing Techniques
Occasionally, the surface needs a deep clean to remove sticky spills or embedded grime.
- Low-Pressure Washing: You can use a power washer, but you must be careful. Using a high-pressure industrial nozzle (often exceeding 1500 PSI) can cut into the rubber like a knife.
- Mild Detergents: Use non-solvent, neutral-pH cleaners. Harsh chemicals like turpentine or strong solvents can dissolve the polyurethane binder holding the floor together.
Inspecting for Wear, Gaps, and Surface Integrity
You can’t fix what you don’t inspect. A documented inspection routine helps you catch small issues before they become major liabilities. Focus your attention on high-traffic zones, such as the bottom of slides and under swings.
Wear Patterns
Look for “granulation.” This happens when the glue holding the rubber granules releases, and loose rubber starts appearing on the surface. This is a sign that the wear layer is thinning. If you see the black base layer showing through the colored top layer, the surface has lost its structural integrity in that spot.
Seam Separation
For interlocking tiles, inspect the grid lines. Weather cycles cause expansion and contraction. Over time, this movement can pop the locking mechanisms.
- The Gap Test: If a credit card fits easily into a gap between tiles, dirt will soon follow.
- Vertical Displacement: Check if one tile is sticking up higher than its neighbor. This creates a trip hazard that violates ADA compliance.
Loose-Fill Depth Checks
For Engineered Wood Fiber, use a depth probe or a marked ruler. You must verify that the material is still 9 or 12 inches deep across the entire play zone, not just at the edges.
Patching and Repairing Common Surface Damage
Speed is everything here. When you find damage, immediate action stops the spread. A small crack in a rubber surface can grow rapidly if water gets inside and freezes, expanding the gap.
Poured-in-Place Repair Kits
Most suppliers sell DIY patch kits for small holes. The process is similar to patching a hole in drywall but with different chemistry.
- Cut: Use a utility knife to cut out the damaged rubber area, creating clean, square edges.
- Mix: Combine the rubber granules and binder in a bucket or tub.
- Trowel: Spread the mix into the hole and smooth it down level with the surrounding floor.
Tile Replacement
If a rubber tile is damaged, do not try to glue it back together. Unlock it and replace the entire unit. This restores the factory safety rating immediately.
Table: Troubleshooting Common Surface Issues
| Issue Identified | Probable Cause | Recommended Action |
|---|---|---|
| Loose Granules | Binder failure or UV damage | Apply a “re-binder” coating to seal the surface. |
| Puddling Water | Clogged pores or poor sub-base | Vacuum pores; check sub-base drainage. |
| Gaps > 0.5 Inch | Shrinkage from cold/heat | Clean gap and fill with color-matched caulk/rubber. |
| Hard Spots | Compacted loose-fill material | Rake and aerate the wood fiber immediately. |
| Algae Growth | Shaded, damp areas | Scrub with mild soap and treat with anti-fungal. |
Conclusion
The bottom line is simple: choosing the right outdoor playground flooring is a trade-off between writing a large check now (unitary surfaces) or writing smaller checks forever (loose-fill maintenance). Whether you opt for the premium durability of poured-in-place rubber or the budget-friendly nature of engineered wood fiber, adhering to IPEMA certified standards and committing to a maintenance schedule are the keys to a successful project.
If you need help selecting the perfect surface for your specific site conditions and budget, or require a quote for professional installation from a trusted playground manufacturer, please do not hesitate to reach out.