-
Whatsapp: +86 15516933785
-
Email: hanlin@hanlinplayground.com
-
Address: Shangjie District, Zhengzhou City, Henan Province, China
-
Whatsapp: +86 15516933785
-
Email: hanlin@hanlinplayground.com
-
Address: Shangjie District, Zhengzhou City, Henan Province, China

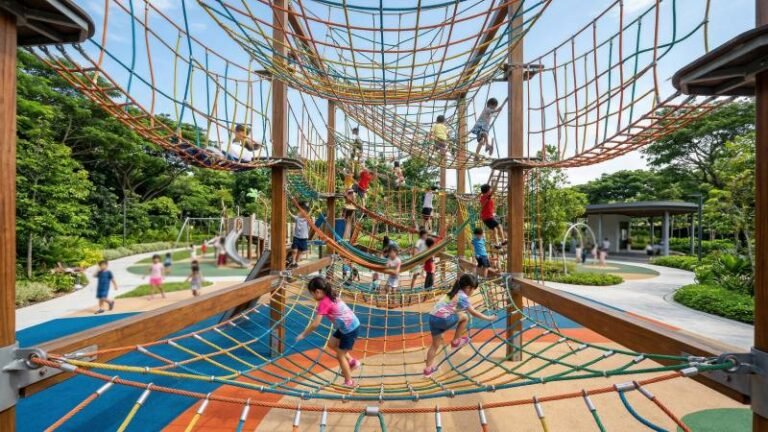
How to Clean Indoor Playground Equipment: The Complete Safety & Sanitation Guide

What is the comprehensive process for cleaning and sanitizing indoor playground equipment safely?
The comprehensive process involves a multi-step protocol: selecting non-abrasive tools and ammonia-free cleaners, performing a pre-cleaning inspection, washing surfaces with mild soap to remove grime, applying an EPA-registered sanitizer with proper dwell time, and strictly adhering to a daily, weekly, and monthly maintenance schedule.
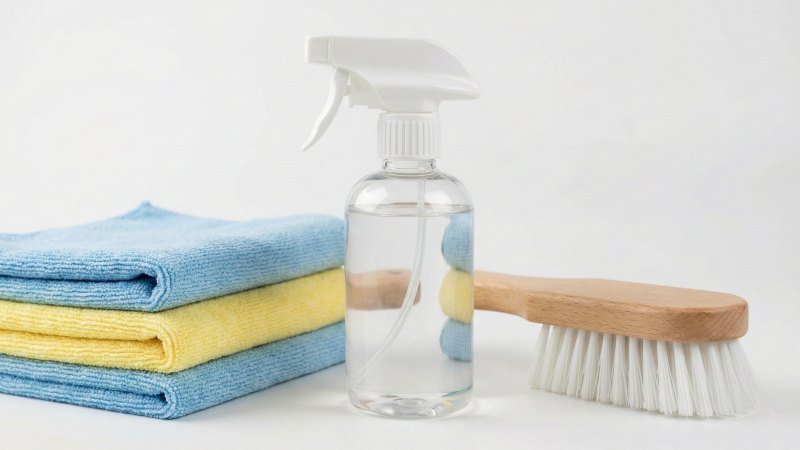
Essential Cleaning Supplies and What to Avoid
What are the specific chemical solutions and tools required to safely clean indoor playground equipment without causing damage?
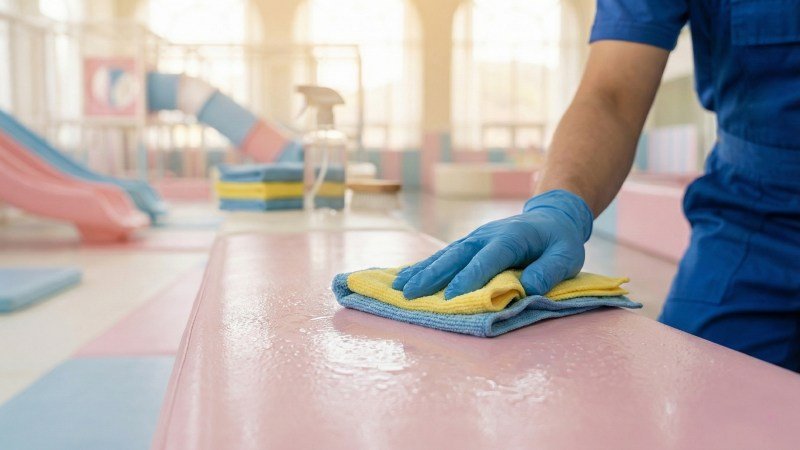
To effectively maintain indoor playground equipment, operators should primarily use a solution of warm water mixed with a mild, non-abrasive liquid soap for cleaning, followed by an EPA-registered sanitizer specifically formulated for use on vinyl and plastics. Regarding tools, soft microfiber cloths are mandatory for wiping surfaces to prevent scratches, while soft-bristle brushes are necessary for cleaning textured ropes and netting. Conversely, harsh chemicals containing ammonia or bleach, as well as abrasive tools like paper towels and scouring pads, must be strictly avoided as they degrade materials and compromise structural safety.
Approved Cleaning Solutions: Mild Soap and CDC-Recommended Sanitizers
Selecting the correct liquid solution is the foundation of playground hygiene. You cannot simply grab any bottle from under the sink. Indoor playground equipment is primarily made of PVC vinyl, polyethylene plastics, and nylon netting. These materials are durable against impact but highly sensitive to chemical corrosion.
The First Line of Defense: Mild Soap
For the initial removal of dirt and grime, a mild, pH-neutral detergent is the industry standard. This is typically a commercial-grade dish soap or a specific “playground wash” sold by equipment manufacturers.
- Why it works: Mild soap creates surfactants. These molecules lift body oils and sticky residue off the vinyl surface without eating into the material.
- The danger of harsh cleaners: Using a high-alkaline cleaner on soft play vinyl is comparable to using an industrial floor stripper on a delicate gymnastics mat. It will dry out the vinyl, causing it to crack and peel over time.
Safe Sanitization Chemicals
Once the surface is visually clean, you must apply a sanitizer. The Centers for Disease Control and Prevention (CDC) recommends avoiding bleach for daily use on these surfaces. Instead, look for Quaternary Ammonium (Quats) based sanitizers.
- Compatibility: Quaternary Ammonium (Quats) are generally safe for plastics and do not cause discoloration.
- Safety: Many formulas are non-toxic once dry, which is vital for areas where children crawl.
Note on Dilution: Chemical concentrations can vary significantly by brand. Always check the specific dilution ratio on the label to ensure the solution is strong enough to kill bacteria but weak enough to protect the vinyl.
The Right Tools: Microfiber Cloths and Soft-Bristle Brushes
The physical tool you hold in your hand is just as important as the chemical in the bottle. Using the wrong material to wipe a surface can cause permanent aesthetic and structural damage in seconds.
Microfiber Cloths
Microfiber is the only recommended textile for wiping smooth surfaces like slides, tube windows, and vinyl mats.
- Dust Trapping: Unlike cotton, microfiber carries a positive charge that attracts dust and locks it into the fibers.
- Scratch Prevention: Microfiber is exceptionally soft. This prevents micro-abrasions on the clear plastic windows often found in crawl tubes.
Soft-Bristle Brushes
You cannot wipe a rope or a webbed net with a cloth effectively. For these textured ropes and netting, a soft-bristle brush is required.
- Application: These brushes reach into the fibers of the webbing to dislodge dust and debris.
- Industry Analogy: Think of cleaning the safety netting like maintaining the webbing on a trampoline park court. A hard wire brush would fray the fibers, compromising strength, but a soft nylon brush agitates the dirt safely so it can be vacuumed away.
The Blacklist: Why You Must Never Use Paper Towels or Ammonia
Many new playground owners accidentally ruin their equipment within the first year by using common household cleaning items. There are two primary offenders that you must ban from your maintenance closet immediately.
The Problem with Paper Towels
It seems convenient to use disposable paper towels, but they are destructive to plastic.
- Wood Pulp: Paper towels are made from wood pulp. On a microscopic level, they are rough and abrasive.
- The Result: Scrubbing a clear polycarbonate dome with a paper towel is like sanding it with fine grit sandpaper. Over time, the clear window will become cloudy and opaque, ruining the visibility needed for parents to supervise their children.
The Danger of Ammonia
Ammonia is a common ingredient in glass cleaners, but it is fatal to plastics.
- Chemical Reaction: Ammonia attacks the molecular bonds of acrylic and polycarbonate.
- Crazing: This leads to a phenomenon called “crazing,” which looks like a network of tiny, spider-web cracks. Once crazing occurs, the structural integrity of the window is compromised, and the part must be replaced.
Quick Reference: Safe vs. Unsafe Supplies
| Category | ✅ Safe to Use | ❌ Strictly Avoid | Reason for Avoidance |
|---|---|---|---|
| Cleaning Fluids | Mild liquid dish soap, Warm water | Bleach (undiluted), Ammonia, Acetone | Causes cracking, discoloration, and structural weakness. |
| Sanitizers | Quaternary Ammonium, Hydrogen Peroxide (check label) | Scented sprays with heavy oils | Oils leave a slippery residue that creates fall hazards. |
| Wiping Tools | Microfiber towels, Soft cotton rags | Paper towels, Scouring pads, Steel wool | Creates permanent scratches and clouds clear plastics. |
| Brushes | Soft nylon bristle brushes | Wire brushes, Hard deck scrubbers | Tears netting and punctures vinyl covers. |
The Step-by-Step Cleaning Standard Operating Procedure (SOP)
What is the correct order of operations for cleaning indoor playground structures to ensure compliance and safety?
The industry-standard protocol involves a four-step process: first, inspect the equipment for damage while removing loose debris; second, wash surfaces with a mild soap solution to remove visible organic matter; third, apply an EPA-registered sanitizer, allowing it to remain wet for the manufacturer-specified dwell time; and finally, air dry the equipment completely to prevent mold and bacterial growth.
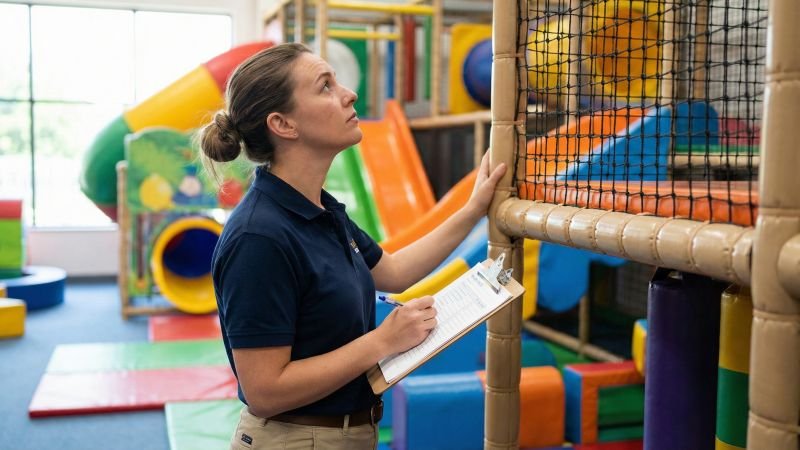
Step 1: Pre-Cleaning Safety Inspection and Debris Removal
Before you apply any liquid to the equipment, you must prepare the area. If you skip this step, you might accidentally rub sharp debris into the vinyl, causing tears.
Remove Loose Debris
Start by removing physical trash. Children often leave behind socks, hair clips, and food wrappers. Use a vacuum cleaner to clear dust from corners and under the floor mats. This “dry cleaning” phase prevents you from simply spreading wet dust around later.
The Safety Audit
While removing debris, perform a visual check of the structure. Look for specific maintenance issues:
- Loose Netting: Check if the zip ties securing the safety netting are intact.
- Exposed Foam: Look for tears in the vinyl that expose the soft foam underneath.
- Hardware: Ensure bolts on slide exits or tube connectors are tight.
Industry Insight: Think of this step like the “walk-around” inspection a technician performs on an arcade game cabinet before opening for the day. You are looking for structural faults (loose joysticks/loose bolts) that need repair before you focus on cleaning the screen.
Step 2: Washing Surfaces to Remove Visible Soil and Grime
Many operators make the mistake of spraying sanitizer directly on dirty surfaces. This is ineffective. You cannot sanitize dirt; you must remove it first.
The Importance of “Organic Load” Removal
“Organic load” refers to body oils, sweat, sticky soda spills, and mud. If this layer remains on the vinyl, it acts as a shield. It protects bacteria from the sanitizer you apply later. Therefore, you must wash the equipment with your mild soap and water solution first.
The Top-Down Method
Always clean from the highest point of the structure down to the floor.
- Start High: Begin with the upper deck panels and tube crawls.
- Work Down: As you wipe, gravity will pull dirty water onto the lower levels.
- Finish Low: Clean the floor mats last.
This method ensures you do not drip dirty water onto a surface you have already cleaned.
Step 3: Applying Sanitizers with Proper Dwell Time
Once the surface is visually clean and free of dirt, it is time to kill the invisible germs. This is where the concept of “Dwell Time” becomes critical.
Understanding Dwell Time
Sanitizers do not work instantly. They need to sit on the surface to be effective. Dwell time is the amount of time the solution must remain wet on the surface to kill the target bacteria or viruses.
- Spray: Apply the sanitizer generously.
- Wait: Do not wipe it off immediately. Let it sit.
- Wipe (Optional): After the time has passed, wipe away excess if required by the instructions.
Variation in Specifications
Please note that dwell times vary significantly depending on the chemical brand and concentration. Some require 60 seconds, while others require up to 10 minutes. Always verify the exact contact time listed on the label of your specific sanitizing product.
Cleaning vs. Sanitizing vs. Disinfecting
| Term | Action | Purpose | When to Use |
|---|---|---|---|
| Cleaning | Physical scrubbing with soap | Removes visible dirt and oils | Step 2 (Always first) |
| Sanitizing | Applying chemical solution | Lowers germ count to safe levels | Step 3 (Daily maintenance) |
| Disinfecting | Applying stronger chemicals | Kills 99.999% of germs | Step 3 (During outbreaks/Body fluid incidents) |
Step 4: Thorough Air Drying to Prevent Mold Growth
The final step is often overlooked, yet it is crucial for the longevity of your equipment. Indoor playgrounds are made of soft foam wrapped in vinyl. If moisture penetrates the seams, it gets trapped in the foam.
The Risk of “Wicking”
“Wicking” occurs when water seeps through the stitching of the vinyl mats. Once the internal foam gets wet, it acts like a sponge. Dark, damp foam is the perfect breeding ground for mold and mildew. This can ruin the equipment from the inside out, leading to expensive replacements.
Proper Drying Techniques
- Ventilation: Keep the facility’s HVAC fans running during the cleaning process.
- Air Movers: Use industrial floor fans to circulate air through the play structure tunnels.
- Wipe Dry: If puddles form in low spots (like the bottom of a slide), use a dry cloth to soak them up.
You must ensure the equipment is 100% dry before allowing children to play. Wet vinyl is extremely slippery and constitutes a major liability risk.
Tackling Difficult Areas and Specialized Equipment
How do you effectively clean complex features like ball pits, ropes, and transparent domes without damaging them or missing hidden bacteria?
Cleaning specialized playground components requires targeted strategies: ball pits must be serviced using a dedicated ball-washing machine or mesh-bag immersion method while simultaneously sanitizing the empty flooring basin; transparent acrylics demand a “flush-and-wipe” technique to prevent scratching; and porous surfaces like ropes and safety netting require agitation with soft brushes to dislodge embedded debris before vacuuming.
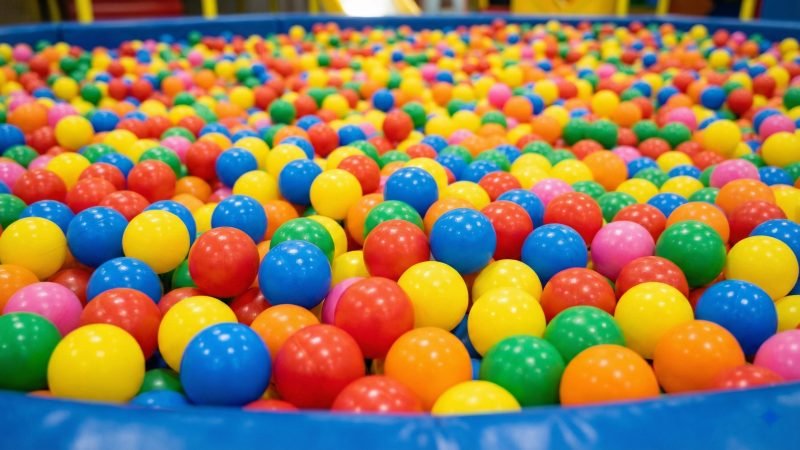
The Ball Pit Strategy: Cleaning the Balls and the Basin
Ball pits are notoriously the most difficult feature to maintain due to the sheer volume of surface area. A medium-sized pit may contain over 10,000 plastic spheres. Simply spraying the top layer is ineffective, as it leaves the bottom layers contaminated.
The Two-Step Cleaning Process
Effective sanitation requires separating the balls from the pit.
- Extract and Wash: The most efficient method is using a commercial ball-cleaning machine. This device sucks up balls, scrubs them with sanitizer brushes, and shoots them into a clean holding net. If a machine is unavailable, you must bag the balls in mesh laundry sacks and submerge them in a sanitizing tub.
- Sanitize the Basin: Once the pit is empty, you will likely find a layer of “fines”—broken plastic pieces, food crumbs, and dust—on the floor. Vacuum this thoroughly. Then, mop the vinyl floor and wall pads with your standard detergent and sanitizer solution.
Industry Warning: Never submerge loose balls in a swimming pool or bathtub without a mesh bag. They are buoyant and difficult to collect, adding hours to your labor time.
Method Comparison: Machine vs. Manual
| Feature | Ball Washing Machine | Manual Mesh Bag Method |
|---|---|---|
| Speed | 10,000 balls / hour (approx.) | 2,000 balls / hour |
| Labor | Low (1 person operation) | High (requires lifting/scrubbing) |
| Drying | Balls exit semi-dry | Requires extensive air-drying time |
| Cost | High initial investment | Low upfront cost |
Protecting Transparent Acrylic Domes and Windows from Scratches
Polycarbonate and acrylic windows (often found in crawl tubes or spaceship themes) are softer than glass. They do not shatter, which makes them safe for kids, but they scratch very easily. Once scratched, they look cloudy and dirty, even when clean.
The “Flush and Wipe” Technique
To prevent scratching, you must remove the abrasive dust before you wipe.
- Flush: Spray the window generously with water or a specialized plastic cleaner. The goal is to let the liquid lift the dust particles off the surface.
- Flow: Allow the liquid to run down the window, carrying the grit with it.
- Wipe: Only after the grit is gone should you gently wipe with a clean, saturated microfiber cloth.
Direction Matters
When wiping these windows, avoid circular motions. Circular rubbing grinds remaining dust into the plastic, creating swirl marks that catch the light. Instead, use long, straight strokes from side to side.
Deep Cleaning Ropes, Webbing, and Textured Surfaces
Ropes, cargo nets, and webbed bridges are textured. Unlike smooth vinyl, they have woven fibers that trap dirt, sweat, and dead skin cells deep inside the material. A simple surface wipe will not clean them effectively.
The Agitation Method
You must mechanically release the dirt from the fibers.
- Step 1: Vacuum First: Use a vacuum with a brush attachment to suck out dry dust. If you wet the dust first, it turns to mud and sinks deeper into the rope.
- Step 2: Damp Scrub: Dip a soft nylon bristle brush into your detergent solution. Scrub the rope gently to agitate the fibers.
- Step 3: Blot Dry: Wrap a dry towel around the rope and squeeze. This pulls the dirty moisture out of the fibers.
Technical Note: Avoid soaking ropes completely. If the inner core of the rope gets saturated, it takes a long time to dry. Persistent dampness in the core can lead to internal mold growth, rotting the rope from the inside out.
Safely Removing Stubborn Scuff Marks and Sticky Residue
High-traffic areas often develop black scuff marks from shoe rubber or sticky patches from spilled juice. Standard soap may not remove these.
Removing Black Shoe Scuffs
Rubber transfer marks are stubborn. A safe industry trick involves using a tennis ball on a stick or a clean, white pencil eraser. The friction lifts the rubber mark without damaging the vinyl pattern.
- Chemical approach: If friction fails, you may use a specialized vinyl cleaner. Apply a small amount to a cloth and rub the scuff gently.
Dissolving Sticky Residue
For stickers or gum residue, citrus-based solvents are effective. However, they are oily.
- Apply: Dab the solvent on the sticky spot.
- Remove: Wipe away the residue.
- Wash Immediately: You must wash the area with soap and water immediately after. If you leave the solvent on, it will make the floor slippery and may degrade the vinyl print over time.
Please note that vinyl durability varies by manufacturer. Always test any solvent or friction method on a small, hidden area (like the back of a pad) first to ensure it does not remove the color.
Recommended Cleaning Frequency Schedule
How frequently must indoor playground equipment be cleaned to maintain hygiene standards and customer safety?
Commercial playground maintenance schedules are divided into three tiers: daily spot cleaning of high-traffic areas and removal of debris; weekly sanitization of all accessible surfaces including netting and pads; and monthly deep cleaning of hard-to-reach components like ball pits and structural connections.
Daily Checklist: High-Touch Points and Spot Cleaning
You cannot deep clean the entire structure every single day. Instead, your daily routine should focus on “High-Touch Points.” These are the specific areas where hands and feet constantly make contact.
Identify the Hotspots
Just as a ropes course instructor checks the carabiners before every climb, you must prioritize critical contact zones in a playground.
- Entry and Exits: The handles at the entrance of the play area and the exit regions of slides accumulate the most oils.
- Handrails: Any railing used for climbing stairs or ramps.
- Interactive Panels: Tic-tac-toe boards or steering wheels found inside the structure.
The “Clean-As-You-Go” Protocol
Staff should perform “spot cleaning” throughout the day. If a child spills a drink or leaves a smudge on a window, clean it immediately. Do not wait for closing time. This prevents sticky residues from hardening, which makes them much harder to remove later.
Visual Inspection: Use this daily time to look for wear and tear. If you see a loose thread or a cracked window while wiping, log it immediately.
Weekly Routines: Comprehensive Surface Wipe-Downs
Once a week, usually during a slower morning or after hours, your team needs to perform a comprehensive wipe-down. This goes beyond just the busy spots.
Complete Surface Coverage
During the weekly clean, you must address the vertical surfaces and lower-traffic areas.
- Vinyl Pads: Wipe down the vertical safety pads wrapped around the steel poles.
- Netting: Visually inspect and lightly brush the safety netting to remove dust bunnies that gather near the floor.
- Flooring: Thoroughly sanitize the foam floor mats, ensuring you reach into the corners where dust collects.
The “Top-to-Bottom” Logic
Consistency is key here. Assign staff to specific zones. Ensure they wipe the upper levels of the play structure before they clean the flooring below. This prevents dust from falling onto already-clean floors.
Monthly to Quarterly Deep Cleaning Tasks
Deep cleaning involves tasks that are too time-consuming for a daily or weekly roster. These tasks often require closing specific sections of the playground or bringing in extra staff.
Under the Mats
Moisture and crumbs inevitably migrate through the cracks between floor mats. Once a month, you should lift the modular floor mats to clean the sub-floor concrete underneath. If left unchecked, trapped moisture here causes foul odors and mold.
High-Level Dusting
Dust settles on the very top of the play tubes and the structural steel beams. While children do not touch these areas, accumulated dust can fall off and irritate allergies. Use an extension duster to clean these overhead components.
The Rotation System
Since deep cleaning is labor-intensive, many facility managers use a rotation system. For example, clean the ball pit in Week 1, lift the mats in Week 2, and dust the high beams in Week 3. This spreads the labor cost out evenly over the month.
Maintenance Schedule Summary
| Frequency | Focus Area | Primary Goal | Estimated Time |
|---|---|---|---|
| Daily | Handrails, Slide Exits, Entrances | Hygiene & Immediate Safety | 30-60 Minutes |
| Weekly | Vinyl Pads, Netting, Flooring | General Sanitation | 2-3 Hours |
| Monthly | Sub-floors, Tops of Tunnels | Deep Clean & Mold Prevention | 4-6 Hours |
| Quarterly | Ball Pits (Full Emptying) | Deep Sanitation | 1 Full Day (varies by size) |
Please note that cleaning frequencies may need to increase during flu season or based on local health department regulations. Always consult your local guidelines to ensure full compliance.
Conclusion
Maintaining a rigorous cleaning schedule is not just about keeping your facility looking new; it is about protecting your most valuable asset—your customers. By adhering to the correct protocols, using the right supplies, and avoiding harmful chemicals like ammonia, you extend the lifespan of your expensive equipment and ensure a safe, hygienic environment for children. Consistency is the key. Whether it is the daily spot check or the monthly deep clean, every step contributes to a successful and trusted indoor playground business.