-
Whatsapp: +86 15516933785
-
Email: hanlin@hanlinplayground.com
-
Address: Shangjie District, Zhengzhou City, Henan Province, China
-
Whatsapp: +86 15516933785
-
Email: hanlin@hanlinplayground.com
-
Address: Shangjie District, Zhengzhou City, Henan Province, China

Tips for Designing a Small Playground: Maximize Space and Play Value
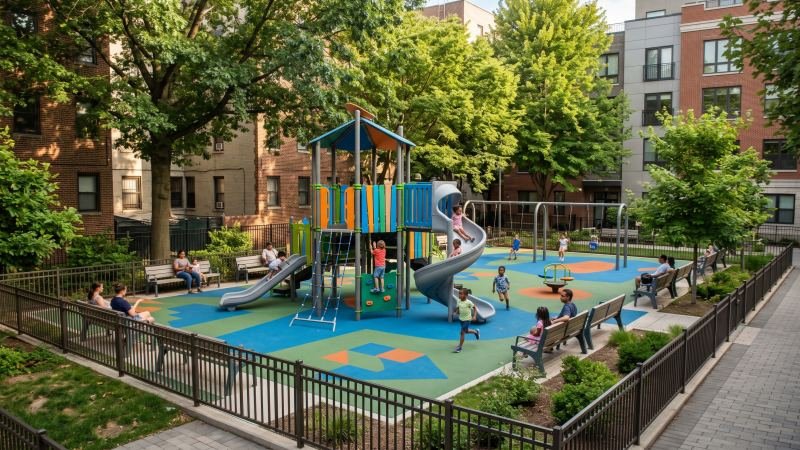
How do you build a highly engaging and fully compliant play area when working with a severely restricted physical footprint?
If you want to pull off a successful small playground, you need to precisely map overlapping safety use zones, select vertical and multi-functional composite structures, and install solid unitary surfacing to maximize play capacity without compromising critical safety or accessibility standards.
Calculating Essential Safety Use Zones
How do you determine the exact safety boundaries required around playground structures in a confined area?
To calculate essential safety use zones, you must measure a minimum six-foot perimeter surrounding stationary equipment and extend the buffer for dynamic structures like swings or slides based on their height and motion range. This specific clearance area ensures that a falling child lands safely on the ground without striking nearby structures or crossing into another child’s active play path.
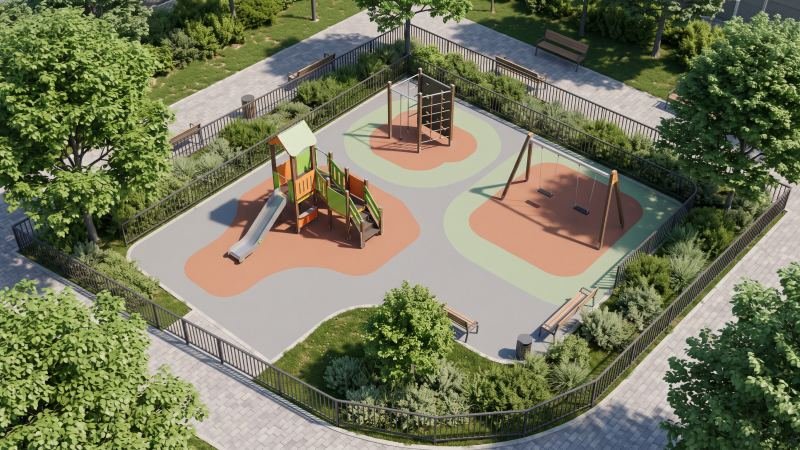
Standard Buffer Distances for Core Equipment
Every piece of equipment requires a specific invisible boundary. The Consumer Product Safety Commission (CPSC) defines this boundary as the use zone. Let’s be clear: getting these numbers right is non-negotiable when designing a small playground. You simply cannot guess these distances.
Look at a use zone as an invisible safety bubble that must surround every play structure. Just as an indoor gymnasium requires clear run-off space around a basketball court to prevent players from crashing into the walls, a climbing frame requires a mandatory empty perimeter outdoors. This perimeter allows for safe physical impact clearance.
To effectively plan your limited space, you need exact numbers. Below is a breakdown of standard CPSC use zone requirements:
| Equipment Type | Required Use Zone Distance |
|---|---|
| Stationary Climbers | 6 feet in all directions from the structure edge |
| Standard Swings | 2x the height of the pivot point (both front and back) |
| Slides | Minimum 6 ft; for platforms > 4 ft, distance equals platform height (max 8 ft) |
| Spring Rockers | 6 feet in all directions |
Keep in mind, though, these safety parameters and dimensional specifications might vary based on specific manufacturer designs or specialized attachments. You should always verify the exact use zone requirements with your equipment supplier before you finalize your site layout to ensure strict compliance.
Mapping Traffic Flow to Prevent Collision Accidents
After you’ve nailed down those buffer distances, you must organize how children move between them. In a tight space, poor traffic flow easily leads to collision accidents. Children naturally run fast from one feature to another. If you don’t predict their pathways, you’re asking for trouble.
Mapping traffic flow in a playground requires the exact same logic as designing pathways in a busy public park or a school campus. Just as park planners route bicycle trails away from pedestrian walking paths to avoid collisions, you must route high-energy playground paths away from main access areas.
To effectively prevent collisions in a compact footprint, follow these spatial rules:
- Isolate Dynamic Exits: Never point a slide exit directly toward a central walkway. Slide exits and swing paths contain high kinetic energy.
- Utilize Safe Overlap Zones: You can legally save space by overlapping use zones, but only under strict conditions. If stationary equipment platforms are exactly 30 inches or less above the ground, their 6-foot use zones can overlap.
- Separate Taller Structures: If stationary equipment is taller than 30 inches, you must maintain a minimum distance of 9 feet between the structures.
- Protect Moving Parts: The use zones for moving equipment, such as swings or merry-go-rounds, cannot overlap with any other equipment’s use zone.
By carefully overlapping the allowed zones, you instantly maximize your small footprint. The result? You create a safe environment where kids can run freely without running into each other.
Selecting High-Capacity Compact Play Structures
How do you maximize play capacity in a small space without overcrowding the physical area?
To maximize play capacity in a confined area, you must select high-density, multi-functional play systems that consolidate various activities into a single footprint. By integrating modular sensory panels, vertical climbing elements, and terrain-adapted features, you can safely accommodate more children per square foot while adhering to strict spatial constraints.
Multi-Sensory and Combination Systems
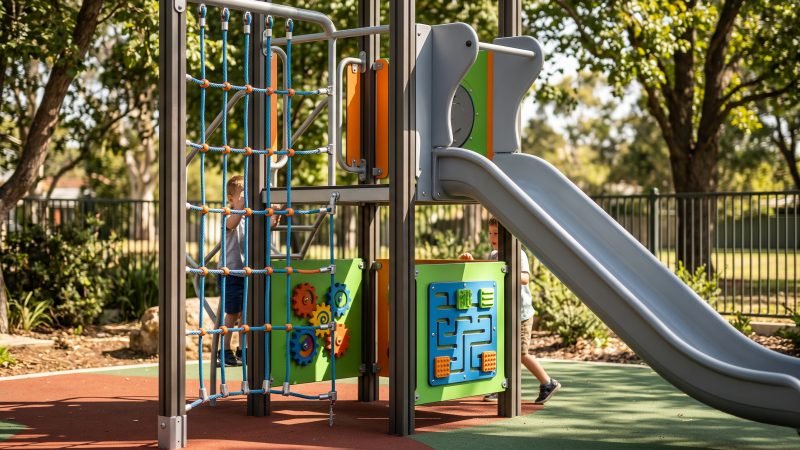
Why buy separate pieces when space is incredibly tight? Combination systems are the most efficient solution for small layouts. These units merge different play elements into one central hub.
Think of a combination play system like a multi-sport athletic court. Instead of paving separate areas for basketball, volleyball, and tennis, facilities paint overlapping lines on one court to accommodate all three. In that same vein, a multi-sensory playground system merges physical climbing, sliding, and tactile games into one compact structure.
By design, these structures utilize the “dead space” underneath elevated platforms. You can easily install tactile gears, musical chimes, or braille boards directly onto the lower support posts. That means zero wasted ground space. Better yet, these inclusive ground panels engage children who might not want to climb.
According to playground industry site layout studies, consolidating equipment drastically reduces your required safety footprint.
| Play Configuration Strategy | Average Footprint Required | Children Accommodated |
|---|---|---|
| Three Freestanding Units | 1,200 sq. ft. | 10 – 15 |
| One Compact Composite System | 700 sq. ft. | 15 – 20 |
The data speaks for itself. Replacing standalone items with a composite structure saves massive amounts of space, giving you a higher play value per square foot.
Expanding Upwards with Vertical Climbing Nets
When horizontal space runs out, you must build upwards. Vertical climbing nets offer incredible play value while occupying minimal ground space.
It’s the exact same engineering logic used in indoor rock climbing gyms. When floor space is limited, gyms build towering walls to accommodate dozens of climbers simultaneously. Likewise, playground designers use center-mast rope structures to instantly increase user capacity in tight zones.
A standard freestanding spatial net easily supports dozens of active users simultaneously. Moreover, the transparent nature of the cables keeps the small yard from feeling visually blocked. Children navigate complex routes rather than simply climbing a basic ladder. As a result, they develop better problem-solving skills and coordination.
Utilizing Natural Slopes for Slide Placement
Do you have a small, annoying hill on your property? If so, an embankment slide is highly advantageous. Embankment slides sit directly on the natural ground contour.
Because the slide follows the earth, it completely eliminates the need for large access stairs. It also removes the need for high structural platforms. Just like that, you instantly reclaim the massive horizontal space usually required for elevated decks.
In park landscaping, this is highly similar to building amphitheater seating directly into a hillside. You are effectively turning an existing topographical challenge into a highly functional asset.
The physical safety zone for an embankment slide is exceptionally small. You strictly need a buffer at the bottom slide exit. The sides of the slide sit completely flush with the surrounding grass or safety surfacing.
At the end of the day, natural slope integration saves both valuable space and equipment money. You remove the bulky structural supports entirely, leaving the remaining flat ground completely open for other interactive activities.
Optimizing Ground Surfacing for Tight Dimensions
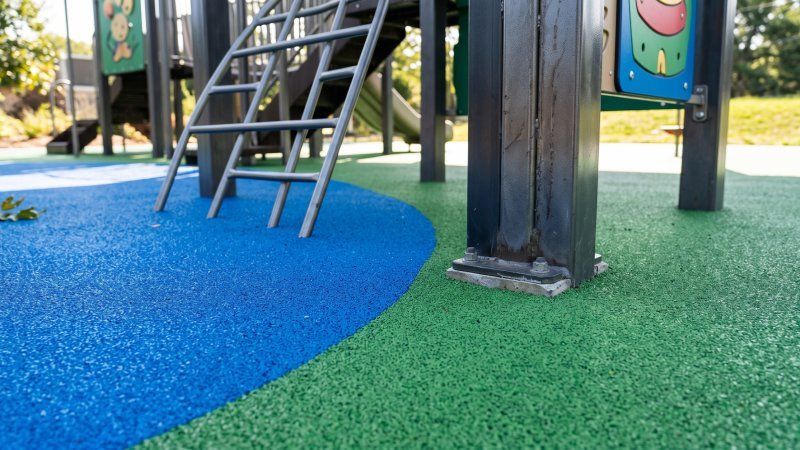
When optimizing ground surfacing in tight dimensions, you must precisely match the material’s impact-absorbing depth to your equipment’s critical fall height. More importantly, selecting a solid unitary surface over loose materials prevents sudden material displacement outside the small boundary, ultimately minimizing daily maintenance and maximizing your usable footprint.
Meeting Critical Fall Height Requirements
Before we talk materials, let’s lock down the critical fall height. Specifically, this technical term describes the highest accessible standing platform on your play equipment. Therefore, your playground ground surface must safely absorb the physical impact of a child falling from that exact elevation.
It’s exactly like calculating the thickness of crash mats in a gymnastics facility. Just as a gymnast performing high-bar routines needs a thicker, denser mat than one practicing floor exercises, playground surfacing must be installed thick enough to absorb the exact kinetic energy generated by a vertical fall from your specific equipment.
That’s why different safety materials require completely different installation depths. For instance, safely absorbing a fall from a 7-foot deck might require 9 inches of engineered wood fiber. Conversely, you might only need 3.5 inches of poured rubber tiles to achieve the exact same protection level.
Because impact attenuation ratings vary based on raw material densities and environmental temperature fluctuations, you must always verify the exact critical fall height test reports and depth specifications with your surfacing supplier before installation. Bottom line: cutting corners on material depth is never a viable option.
Poured-in-Place Rubber vs Loose-Fill Materials
Next, you face a major decision regarding the actual surfacing material type. Ever tried keeping loose wood chips inside a 20-foot perimeter with 30 running kids? It’s an operational nightmare. Tight playground dimensions severely magnify the physical flaws of traditional loose-fill materials. Because children are playing in a highly concentrated area, they rapidly kick loose wood chips or rubber mulch outside the designated safety zones.
This constant physical displacement creates dangerous, exposed bare spots directly under slide exits and swings. Thus, facility maintenance crews must constantly rake the loose materials back into place to maintain safety compliance.
This is where Poured-in-Place (PIP) rubber proves its worth as a surfacing solution for compact footprints. Basically, PIP is a permanent, seamless unitary surface that never moves. Think about selecting a solid rubberized running track over a loose cinder track for athletes. While loose cinders scatter under heavy footings and require constant raking, a solid track remains perfectly intact. Similarly, PIP rubber never displaces under heavy, concentrated playground foot traffic.
To clearly illustrate the spatial and operational differences, review this industry comparison data:
| Surfacing Feature | Poured-in-Place (PIP) Rubber | Loose-Fill (Engineered Wood Fiber) |
|---|---|---|
| Material Displacement | Zero displacement | High displacement in tight areas |
| Daily Maintenance | Very low | Very high (constant raking needed) |
| Space Efficiency | Excellent (sharp, clean edges) | Poor (requires thick retaining borders) |
| Fall Protection Consistency | Always consistent | Highly variable based on material depth |
The verdict? PIP rubber is the operational workhorse for small spaces. Moreover, it completely eliminates the need for bulky perimeter retaining walls, saving precious horizontal inches around the absolute edge of your small yard.
Strategic Layout Planning for Maximum Engagement
How do you organize a highly confined play space to keep every child fully engaged without causing chaos?
To maximize engagement in a confined space, you must intentionally zone the layout by physically separating high-energy activities from calm, sensory-focused areas. Furthermore, you must seamlessly integrate space-saving accessible routes and inclusive ground-level components to ensure all children can play together simultaneously without bottlenecks.
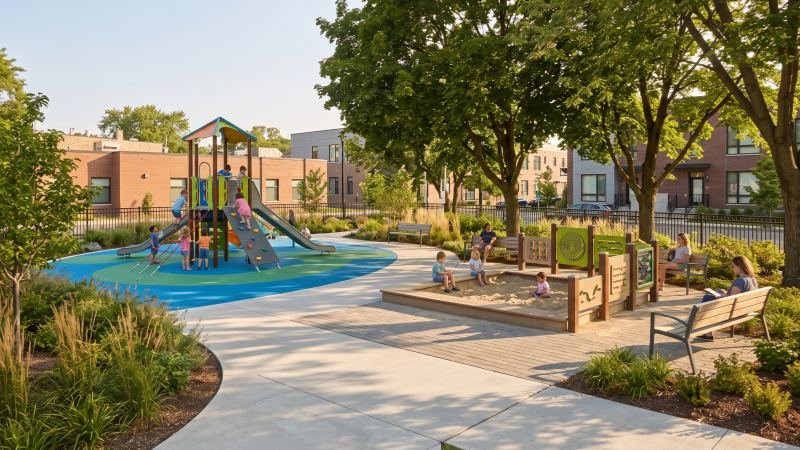
Creating Distinct Active and Reflective Play Areas
Even in a tiny yard, you cannot just group all equipment in the center. Do that, and the space turns into an instant bottleneck. Instead, you must intentionally design separate play zones, strictly dividing the footprint into active play and reflective play.
Think of this zoning strategy like organizing a school library and recess yard. An administrator never places the loud, active recess games right next to the quiet study reading zones. Similarly, you must physically separate fast-paced playground movement from quiet focus zones.
Active zones contain high-energy elements. Specifically, these include overhead climbers and spinning carousels. On the flip side, reflective zones offer mental engagement. These include musical instruments, sand tables, or simple shaded seating. When you separate these areas, children can easily self-regulate their play intensity.
According to playground behavioral design studies, distinct spatial zoning significantly improves play value. Specifically, it reduces physical user conflicts in tight spaces by nearly 40%. As a bonus, reflective zones act as natural waiting areas. If a climbing structure is completely full, a child can quietly engage with a nearby sensory panel instead of just standing around.
Integrating ADA Compliant Features Smoothly
A small footprint never excuses a lack of inclusivity. You must ensure all children can access the main play activities. However, traditional wheelchair ramps consume massive amounts of horizontal space. Therefore, you need smarter integration strategies for tight dimensions.
Look at modern public aquatic centers for comparison. Modern public pools use zero-depth entry ramps directly in the main swimming area rather than forcing users to a separate, isolated therapeutic pool. Likewise, inclusive playground features must sit directly along the primary play routes. You should never push them into hidden corners.
To save space while meeting accessibility standards, you should utilize transfer stations. A transfer station is a specialized low platform that allows a wheelchair user to safely lift themselves directly onto the main play structure. By doing this, you completely eliminate the need for long, space-consuming ramp systems.
Additionally, you must maximize your ground-level components. You can easily install steering wheels, chimes, and interactive games right at the ground level. This specific strategy requires zero extra square footage.
| Accessibility Strategy | Space Required | Integration Method |
|---|---|---|
| Full Ramp System | Very High | Requires long, gradual slopes |
| Transfer Stations | Low | Uses specialized stepped platforms |
| Ground-Level Panels | Zero | Mounts directly to structural posts |
During your design phase, always verify local ADA compliance codes and component ratios to ensure your site meets all legal inclusivity requirements.
Practical Budgeting and Site Preparation
To practically budget your site, you must accurately estimate the combined costs of commercial equipment and professional installation. Furthermore, you must thoroughly assess the terrain for drainage infrastructure and ground leveling. Proper site preparation prevents costly future repairs and ensures the long-term structural integrity of your investment.
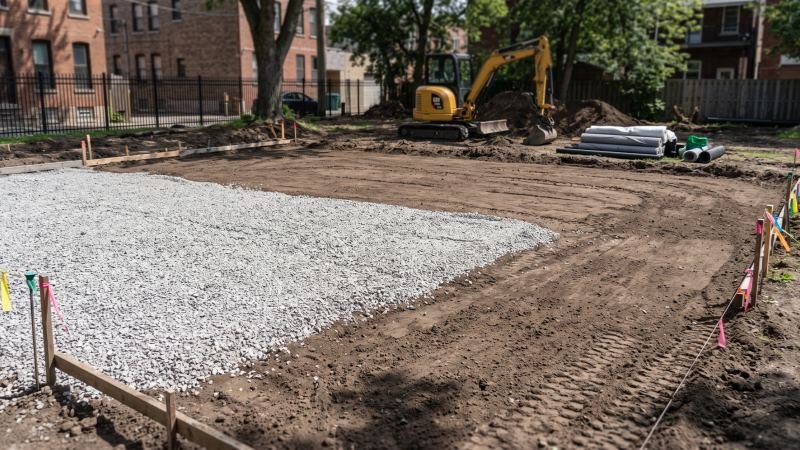
Estimating Core Equipment and Installation Costs
Building a small playground requires precise financial planning. You cannot simply look at the price tag of the play structure alone. Typically, a complete project involves several hidden expenses that catch buyers by surprise.
Estimating this is no different than pricing out a community sports field. You never just pay for the synthetic turf itself; you must account for specialized labor, site grading, and heavy machinery rentals. Similarly, playground equipment is just the starting point of your total project budget.
Generally, industry data shows that professional installation adds significant costs to your baseline. Experienced contractors must pour concrete footings and assemble complex components. Installation usually runs between 25% and 40% of your total equipment purchase price.
Here is a realistic budget breakdown for a standard compact commercial site:
| Expense Category | Typical Cost Range | Percentage of Budget |
|---|---|---|
| Core Play Equipment | $15,000 – $30,000 | 50% – 60% |
| Professional Installation | $4,500 – $12,000 | 25% – 40% |
| Freight and Shipping | $1,000 – $3,000 | 5% – 10% |
Because freight rates and exact labor percentages frequently fluctuate, always finalize a comprehensive quote that includes installation and delivery before securing your funding.
Assessing Drainage and Ground Leveling Needs
Think you can skip the sub-base and just throw down some mulch? Think again. Before you install any equipment, you must prepare the raw earth. A small yard often hides significant grading issues. You simply cannot build a safe, durable structure on uneven or soggy ground.
Proper site preparation acts exactly like preparing the sub-base for a professional tennis court. If the base layers trap water, the playing surface above will quickly warp and crack. Likewise, if your playground foundation lacks proper drainage, your expensive surfacing will degrade rapidly. Worse, standing water quickly corrodes structural steel posts.
Right out of the gate, you must assess ground leveling. Commercial playground equipment requires a perfectly flat installation surface. However, “flat” does not mean completely level.
To ensure proper water runoff, you must grade the soil with a slight slope. Industry standards dictate a 1% to 2% slope across the entire play footprint. This slight pitch is all it takes to allow rainwater to naturally flow away from the central structures without causing equipment instability.
If your site has heavy clay soil, surface grading is often not enough. You must install a sub-surface drainage system. Typically, contractors install French drains beneath the play area to catch excess groundwater and direct it toward a municipal storm sewer.
Make no mistake, ignoring site preparation will destroy your investment. Spending money on proper dirt work upfront saves you thousands of dollars in future repairs.
Conclusion
Pulling off a small playground design doesn’t require magic; it requires exact math, strict adherence to safety standards, and ruthless space management. By accurately calculating use zones, choosing multi-functional composite structures, optimizing unitary surfacing, and preparing your site correctly, you can create an incredibly engaging and durable environment regardless of physical constraints. Transforming a compact footprint into an inclusive, high-value recreation area is entirely achievable with the right preparation. If you are ready to begin planning your next project, contact us today to ensure your vision is executed safely and efficiently.